Binding Elements to Points and Commands
Bind dashboard elements to data points or a device, color them from the point's status, aggregate several points, and build a command button with password confirmation.
«طراحی سیستم» ← «طراحی داشبورد» ← «داشبوردهای من» ← طراح ← زبانهٔ «ENIDs»؛ حدود نقطه: «طراحی سیستم» ← «مدیریت ساختار» ← «مدیریت ACVها» — «طراحی سیستم» ← «طراحی داشبورد» ← «داشبوردهای من» ← طراح ← زبانهٔ «ENIDs»؛ حدود نقطه: «طراحی سیستم» ← «مدیریت ساختار» ← «مدیریت ACVها» — «طراحی سیستم» ← «طراحی داشبورد» ← «داشبوردهای من» ← طراح ← زبانهٔ «ENIDs»؛ حدود نقطه: «طراحی سیستم» ← «مدیریت ساختار» ← «مدیریت ACVها» — System Design → Dashboard Design → My Dashboards → designer → ENIDs tab; point limits: System Design → Structure Management → ACV Management
A dashboard that is not connected to data is just a picture. In this lesson you learn to connect an element to a single data point or to a whole device, change its color based on the point's status, aggregate several points into one element, and set up a button to send a command. All of this happens inside the 2D designer (lesson B8).
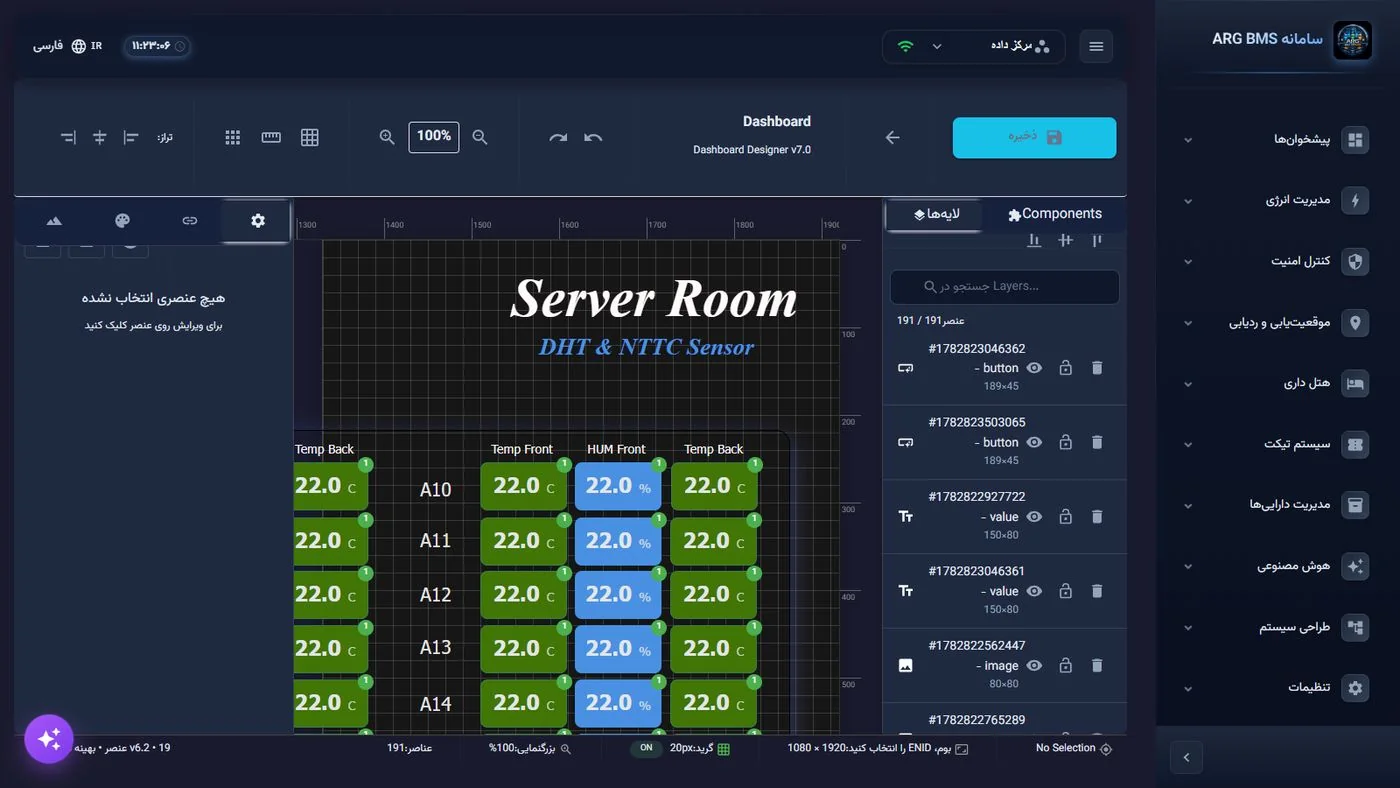
Get to know the screen
In the designer, every data point is called an ENID. An ENID is a 16-digit identifier that encodes the point's location and type:
| Segment | Length | Description |
|---|---|---|
| Device serial | 4 digits | e.g. 1001 |
| Base | 4 digits | The point's path or communication protocol |
| Category | 3 digits | Quantity type, e.g. temperature |
| Input/Output | 1 digit | 0 input (readable), 1 output (commandable) |
| Data type | 1 digit | 0 boolean, 1 integer, 2 decimal, 3 counter, 4 string |
| Port number | 3 digits | e.g. 001 |
Bindings are configured in the properties panel, on the ENIDs tab (chain icon). This tab has a ENIDهای متصل (Connected ENIDs) section with a counter, an افزودن ENID (Add ENID) button, and, after an "or" separator, the option اتصال به یک دستگاه (به جای ENID) (Bind to a device (instead of an ENID)) with a دستگاه متصل (Connected Device) field. Colors and calculations are configured in the ویژگیها (Properties) tab.
Step by step
A — Binding data
- Select the element. In the designer, select a Value Display on the canvas and open the ENIDs tab in the properties panel. If nothing is bound, the message ENID متصل نیست (No ENID connected) is shown.
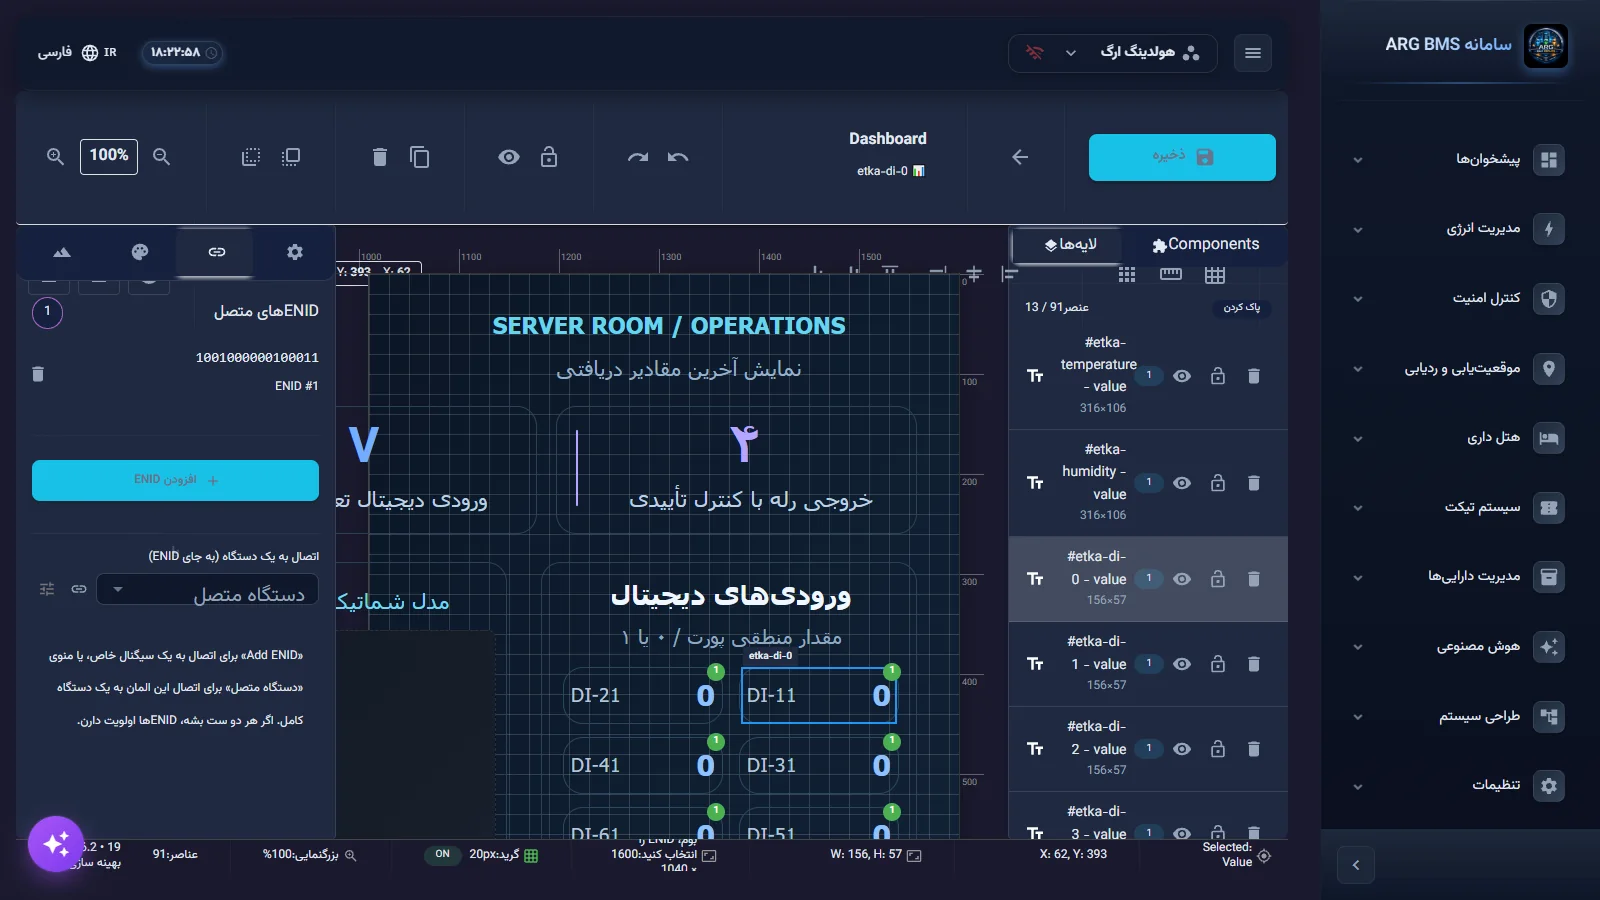
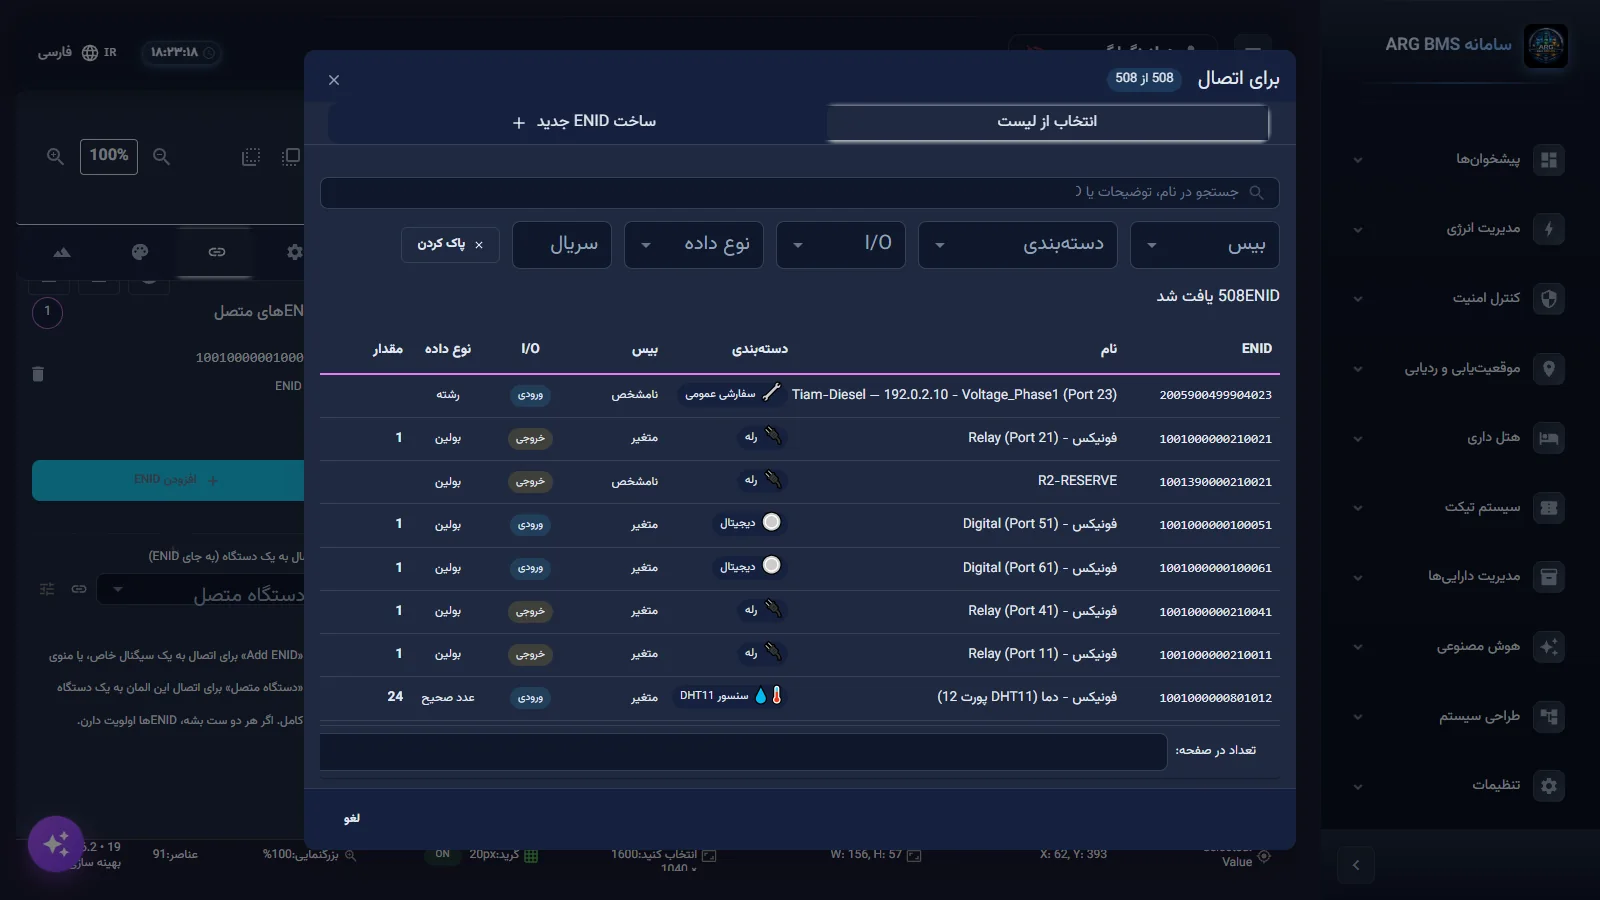
ENIDs tab · the "Connected ENIDs" list, the "Add ENID" button, and the "Connected Device" field - Pick the point from the list. Click افزودن ENID. On the انتخاب از لیست (Select from list) tab, find the point by searching its name or ID, or by the بیس (Base), دستهبندی (Category), نوع ورودی/خروجی (Input/Output type), نوع داده (Data type), and شماره سریال دستگاه (Device serial number) filters. The table's columns are ENID, نام (Name), دستهبندی, بیس, نوع داده, and مقدار (Value), so you can see the point's live value before selecting it. Select the row and click تایید انتخاب (Confirm selection).
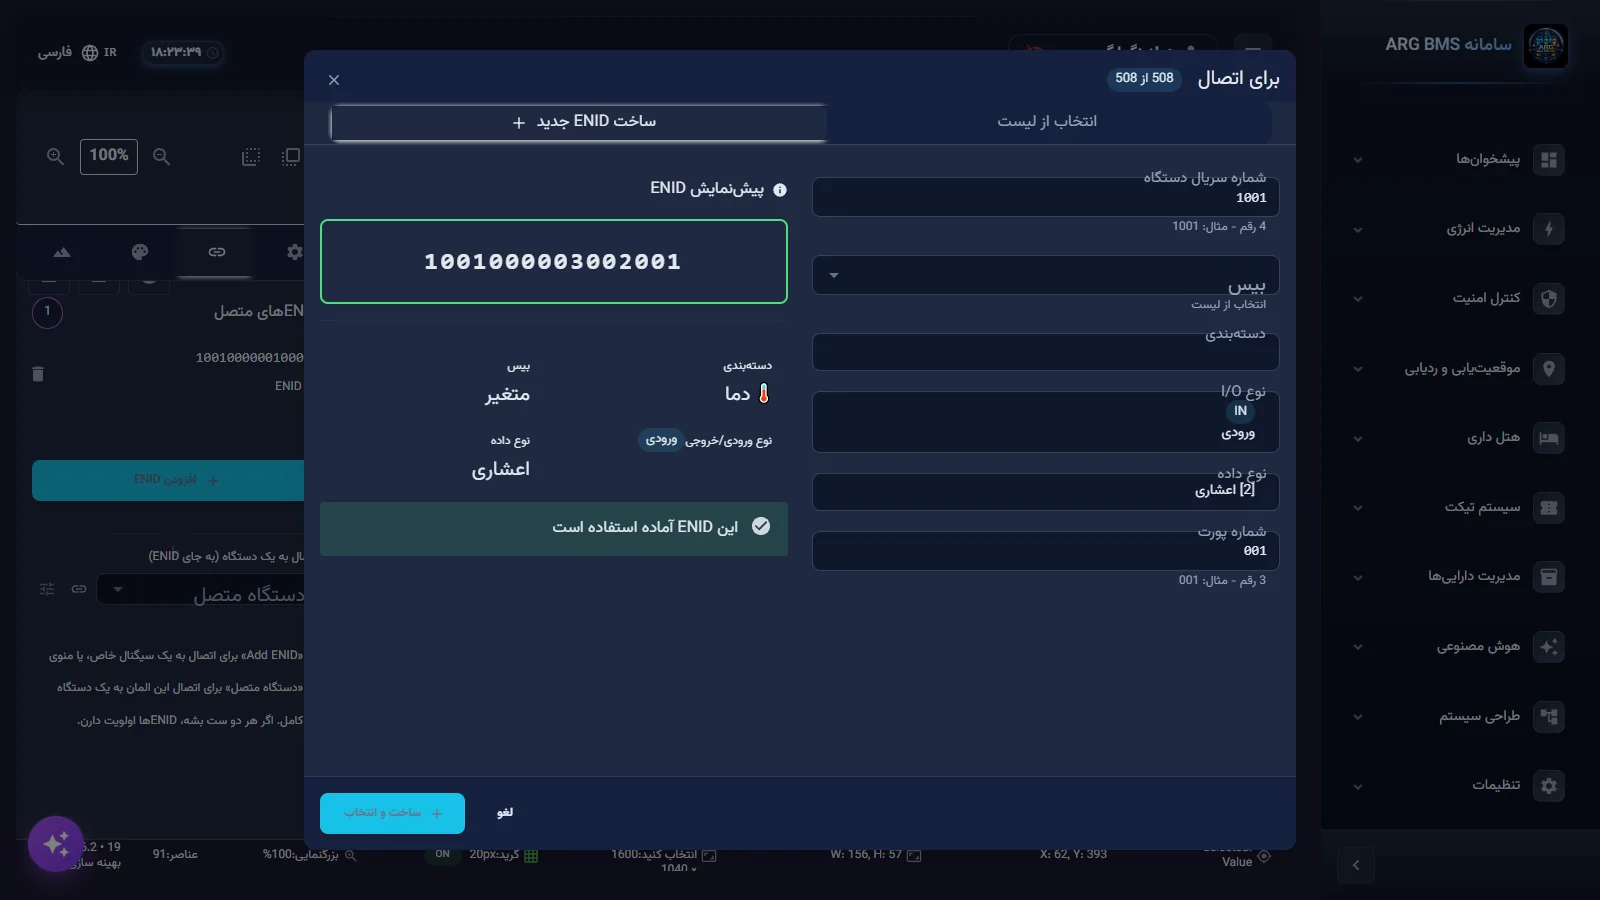
Select from list · filters sit above the table, and the "Value" column shows each point's current value - Create a new ENID if needed. If the point has not been defined yet, open the ساخت ENID جدید (Create new ENID) tab and fill in شماره سریال دستگاه (4 digits), بیس, دستهبندی, نوع I/O (I/O Type), نوع داده, and شماره پورت (Port number) (3 digits). پیشنمایش ENID (ENID preview) shows the character count out of 16. If the ENID already exists, the warning "This ENID already exists" appears. The ساخت و انتخاب (Create and select) button is enabled only once the ID is exactly 16 digits.
Create new ENID · the six fields that build the identifier, and the 16-digit preview - Or bind a whole device instead. Instead of an ENID, you can pick a device under دستگاه متصل. In that case the system shows the device's first analog variable unless you pick a specific one. If both an ENID and a device are set, the ENID takes priority.
- Set up how the value is shown. In the ویژگیها tab, under تنظیمات مقدار (Value Settings), set the واحد (Unit) (e.g. °C), مکان های اعشاری: (Decimal places:), prefix, and suffix.
B — Color by status
Besides the value, the server also sends a status for every point. This status has five states and is derived from the limits configured on the point itself, under «طراحی سیستم» ← «مدیریت ساختار» ← «مدیریت ACVها» (System Design → Structure Management → ACV Management). The designer has no separate condition editor (such as "turn red if greater than 28"); you define the threshold on the point, and the element only sets the color for each status.
| Status | Meaning | Default color |
|---|---|---|
| DISABLE (0) | Disabled | Gray |
| NORMAL (1) | Normal | Green |
| CAUTION (2) | Caution | Orange |
| DANGER (3) | Danger | Red |
| ERROR (4) | Error | Dark red |
- Check the point's limits. In مدیریت ACVها (ACV Management), make sure a low and high limit (and critical limits if needed) are defined for the point. Without limits, the point always stays in the normal status.
- Choose the color for each status. On the Value Display, in the ویژگیها tab, open the حالت رنگ ها (Color States) section. مقدار پیش فرض رنگ (Default value color) is the value text's normal color, and five color pickers, one per status, sit below it.
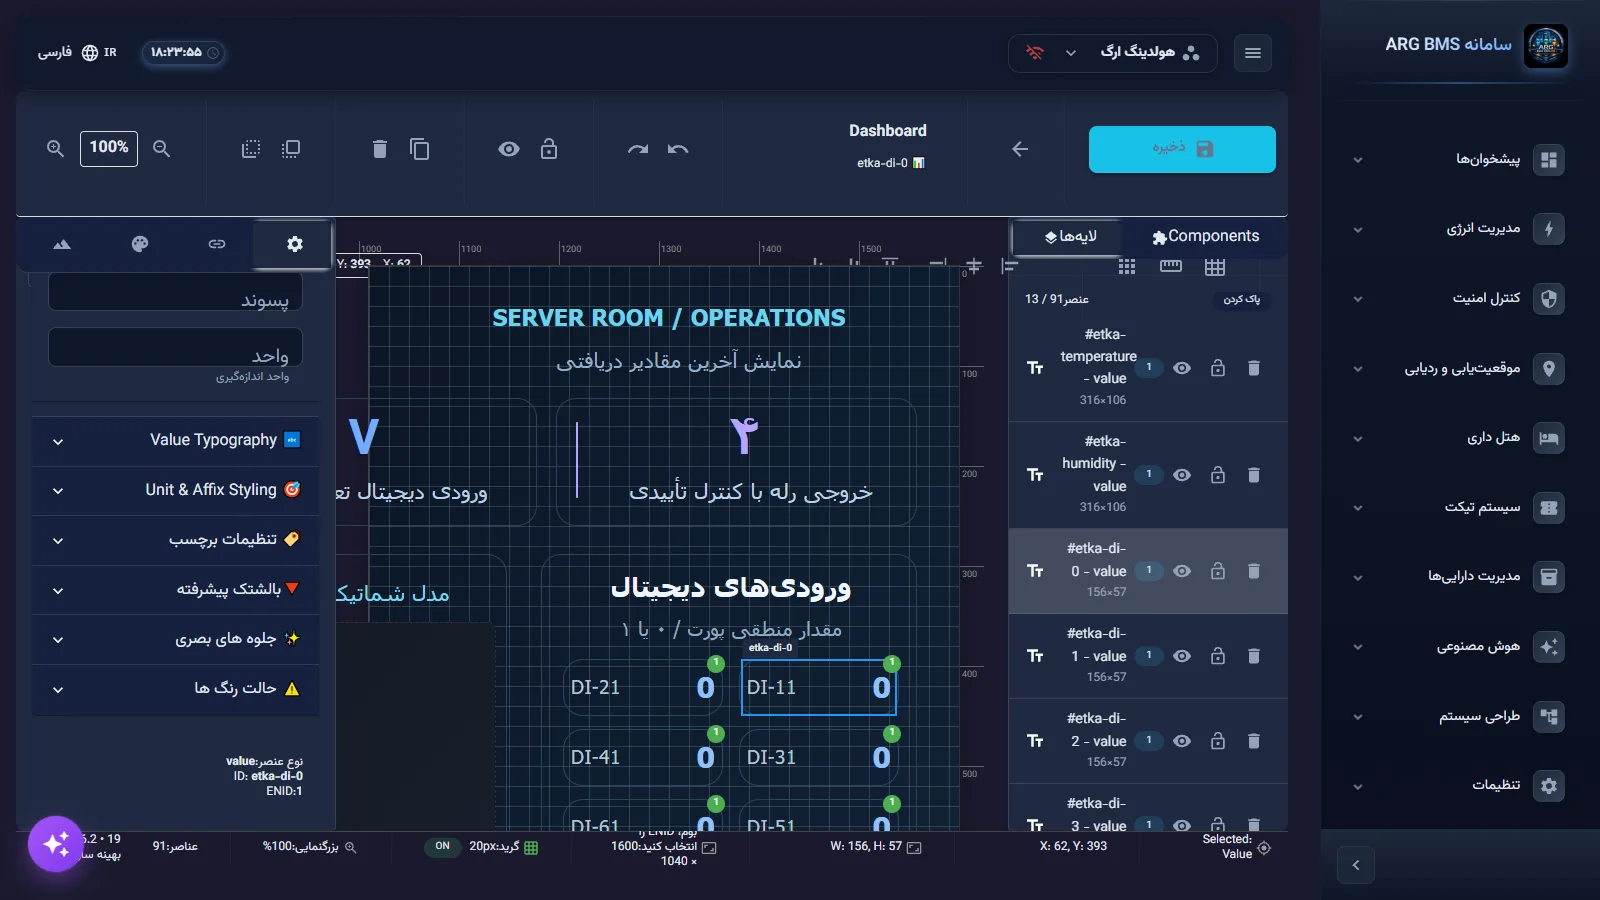
Color States · one color picker for each of the five statuses, 0 through 4 - Apply the same logic to images and animated equipment. On an Image element, enable حالت پویا (بر اساس ENID) (Dynamic mode (based on ENID)) and, under وضعیت تصاویر (Status Images), set an image for each status; or under نگاشت ارزش (Value Mapping) set an image for specific values. On BMS Animation, in the مقداردهی (Value mapping) tab, turn on فعالسازی مقداردهی (Enable value mapping) and pick one of the پیشتنظیمها: (Presets:), for example "On/Off", "Alarm states", or "Tank level (0-100%)".
C — Aggregating several points
- Add several ENIDs. Bind two or more ENIDs to a single Value Display. The محاسبات آماری (Statistical Calculations) section only works once more than one ENID is connected.
- Pick the function. Turn on فعالسازی محاسبات (Enable calculations) and choose one from تابع محاسباتی (Calculation function): the basic group (first or last value), the statistical group (average, maximum, minimum, sum, count, median, mode, range), or the advanced group (standard deviation, variance, RMS, 90th and 95th percentile). Under تنظیمات فیلتر: (Filter settings:) you can ignore null or zero values. Example use: the average temperature of five sensors in a hallway.
D — Commands
- Bind the button to an output point. Add a Button. Under اتصال ENID (ENID binding), pick an ENID of type output. Until an ENID is selected, the warning "Select an ENID to send a command" appears.
- Set the button's behavior. Under رفتار دکمه (Button Behavior), set نوع عملکرد (Action type) to ارسال فرمان به ENID (Send command to ENID). The other two options are لینک به URL (Link to URL) and باز کردن داشبورد (Open dashboard). Then choose نوع دکمه (Button type):
- لحظهای (Momentary) (Momentary): sends ON while pressed and OFF on release.
- کلیدی (Toggle) (Toggle): each click flips the state.
- پالس (Pulse) (Pulse): sends ON, then OFF after مدت پالس (میلیثانیه) (Pulse duration (ms)).
- سفارشی (Custom) (Custom): sends an arbitrary value.
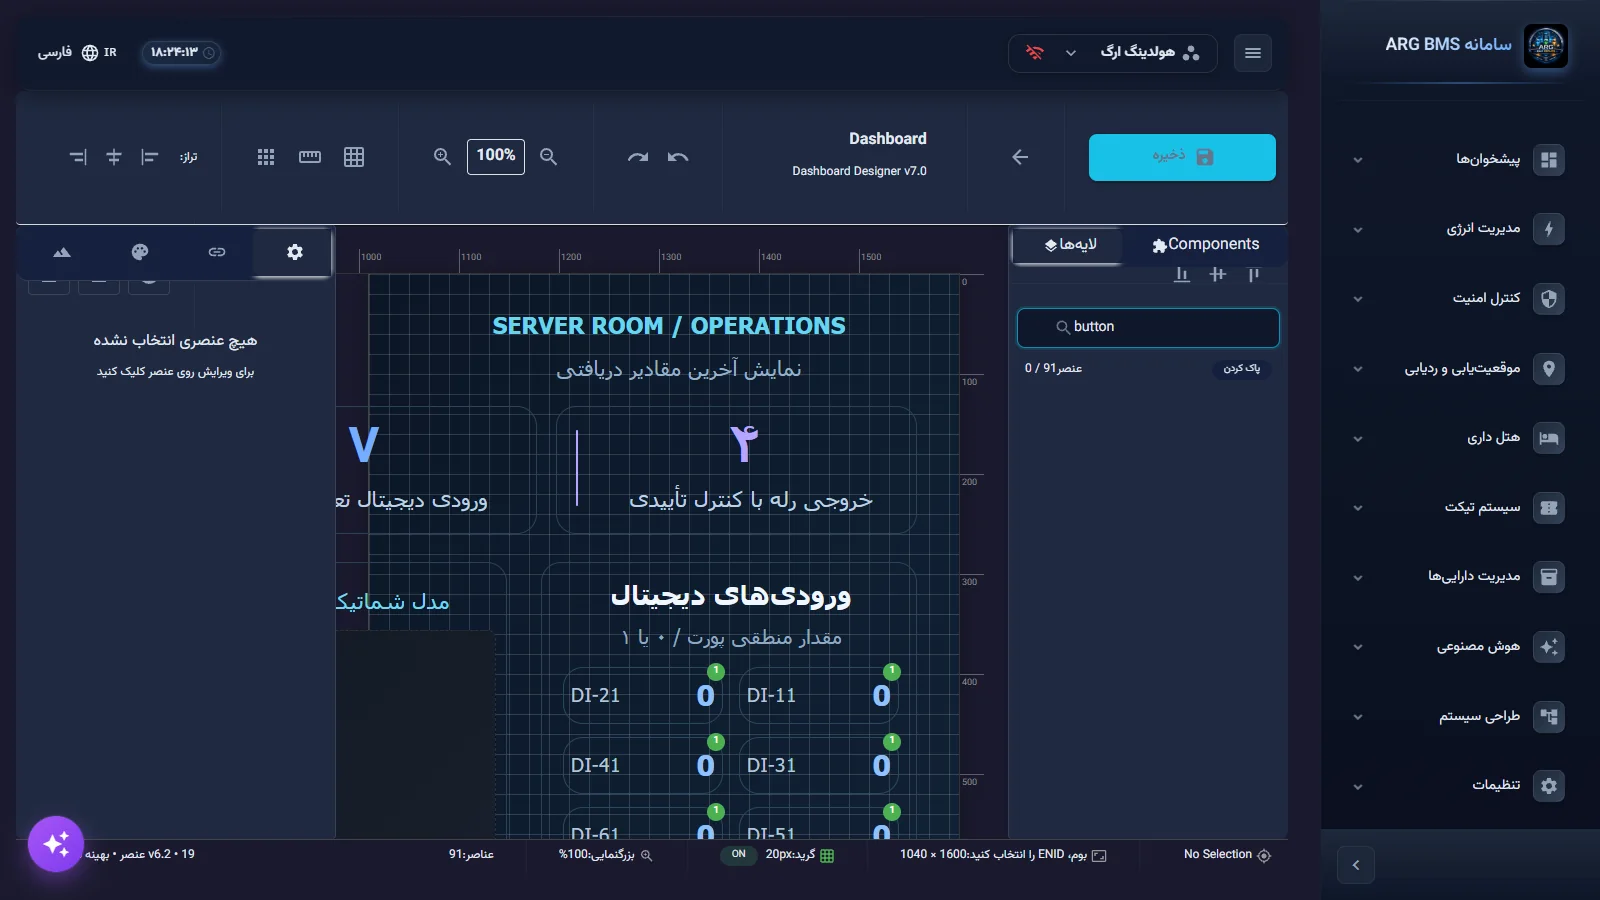
Command button · the "ENID binding" section, "Action type", and "Button type" - Understand the advanced controls. Switch Pro, Slider Pro, Knob, and Thermostat have no separate command field; they send commands to the first ENID connected in the ENIDs tab, so the order of the ENIDs matters.
- Save and test in the live view. Save the dashboard and open it under «پیشخوانها» ← «دیدکلی» (Consoles → Overview). Clicking the button opens the تایید دستور (Confirm Command) window, which asks for your password. After تایید و ارسال (Confirm and Send), subsequent commands are sent for up to 60 seconds without asking for the password again. The command's result is shown step by step with English messages: acceptance by the server while waiting for the device to acknowledge (Accepted by edge), device acknowledgment (Device acknowledged), and seeing the new value (Observed and confirmed). On error, the message Command failed appears.
Tips and common mistakes
- A command button with no ENID does nothing in the live view.
- For a command, select only an output point (input/output digit = 1).
- The command value must be numeric; the server rejects text.
- Define thresholds on the point in "ACV Management", not on the dashboard. Changing a point's limit changes the color of every element bound to it, across every dashboard, at once.
- The "Threshold" mode in BMS Animation is filled only from presets and has no manual editor.
- The point-selection dialog's title in the designer may render incompletely ("for binding"); this is just the title, and the dialog itself works correctly.
Summary
- Data binding is done in the "ENIDs" tab with "Add ENID" or "Connected Device"; the ENID takes priority.
- Colors map to five statuses, 0 through 4, and the status comes from the point's limits in "ACV Management".
- "Statistical Calculations" aggregates several ENIDs into a single number.
- A command button binds to an output ENID and is confirmed with a password in the live view; the confirmation is valid for 60 seconds.
- There is no separate publish step; after "Save", bindings are active in the live view.
Hands-on exercise on the live demo
Work on the public demo (bms.argsrv.com, project "ARG Holding"). Do not change existing demo dashboards or points, and do not send commands to real equipment.
- Open the "Exercise — your name" dashboard from lesson B8 (or create a new exercise dashboard).
- Bind a Value Display to a temperature point via افزودن ENID → انتخاب از لیست, and set واحد to °C.
- Under حالت رنگ ها, set the NORMAL color to green and DANGER to red. Then, in مدیریت ACVها, just look at the limits defined for that same point and predict at what value the element turns red.
- Build another Value Display with two temperature ENIDs and enable "average" under محاسبات آماری.
- Configure a Button with ارسال فرمان به ENID and کلیدی (Toggle), but close the تایید دستور window with انصراف (Cancel) in the live view.
- Finally, delete the exercise dashboard.
If the demo account does not allow saving, go only as far as the preview stage: set up the bindings and colors in the designer and exit without saving.
Lesson check
Answer at least 3 of 4 correctly to pass.
- 1. How many digits does an ENID identifier have?
- 2. If an element has both an ENID and a "Connected Device" set, which one is used?
- 3. What activates the red (DANGER) color of a Value Display?
- 4. After entering the password in "Confirm Command", how long are subsequent commands sent without a password?