Structure model: project, organization, building, floor, and space
Build the project's spatial hierarchy from organization down to space, so that every piece of equipment can later be assigned to a specific space, and reports, maps, and dashboards can rely on this same structure.
«طراحی سیستم» ← «مدیریت ساختار» ← «مدیریت پروژهها» / «سازمانها» / «ساختمانها» / «طبقات» / «فضاها» / «گروه دستگاهها» — «طراحی سیستم» ← «مدیریت ساختار» ← «مدیریت پروژهها» / «سازمانها» / «ساختمانها» / «طبقات» / «فضاها» / «گروه دستگاهها» — System Design → Structure Management → Project Management / Organizations / Buildings / Floors / Spaces / Device Groups
The digital twin assigns every piece of data to a location. Before equipment can be defined, the project's spatial skeleton must be built: project, organization, building, floor, and space. The product has no level called a "site"; the level that separates business units or independent complexes is the "organization". This lesson covers the build order, the mandatory fields at each level, and common errors.
Understand the hierarchy
Each level depends on the level above it and cannot be saved without it. For this reason, building always proceeds top-down.
| Level | Depends on | Message when the parent is empty |
|---|---|---|
| Project | — | — |
| Organization | Project | — |
| Building | An organization | "Selecting an organization is required" |
| Floor | A building | "Selecting a building is required" |
| Space | A floor | "Floor is required" |
| Device | A space (optional) | — |
| Data point (ACV) | A device | — |
Device groups are not part of this chain. A group is a parallel category (for example, "UPS and Battery Group" or "South HVAC Group") assigned to each device alongside its space, used for filtering and reporting.
Get to know the page
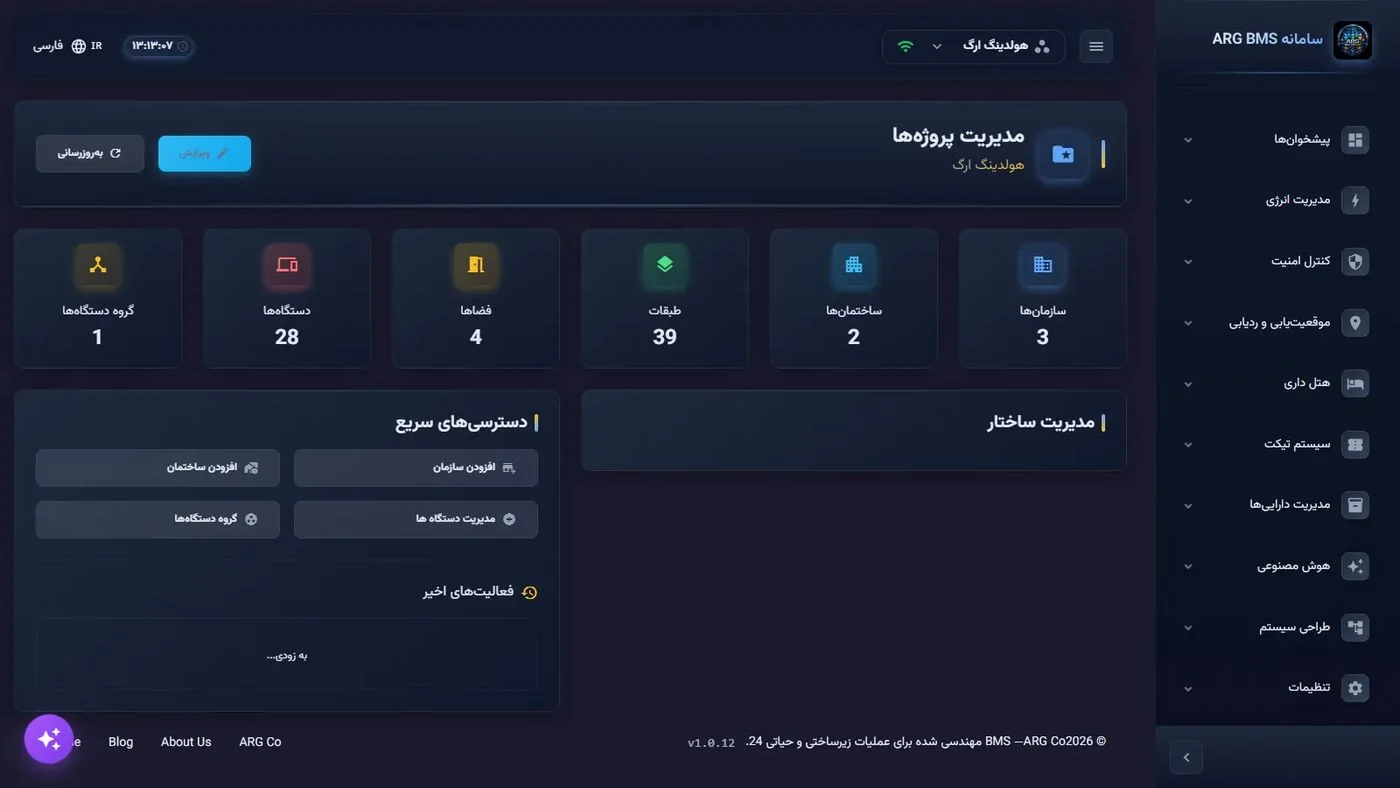
The starting point is the «طراحی سیستم» ← «مدیریت ساختار» ← «مدیریت پروژهها» (« » ← « » ← « » (System Design → Structure Management → Project Management)) page. Below the title, the current project's name is shown.
| Section | Purpose |
|---|---|
| ویرایش (Edit) and بهروزرسانی (Refresh) | Edit the project's name and description; reload the statistics |
| Six stat cards | سازمانها (Organizations), ساختمانها (Buildings), طبقات (Floors), فضاها (Spaces), دستگاهها (Devices), گروه دستگاهها (Device Groups); each card opens the page for that level |
| The مدیریت ساختار (Structure Management) panel | The project's structure tree; if empty, shows the message "No items found" and the افزودن سازمان (Add Organization) button |
| The دسترسیهای سریع (Quick Access) panel | افزودن سازمان, افزودن ساختمان (Add Building), مدیریت دستگاه ها (Manage Devices), گروه دستگاهها |
Step by step
- Review the project name. In "Project Management", click ویرایش. In the "Edit Project" window, the نام پروژه * (* (Project Name *)) field is required and توضیحات (Description) is optional. Confirm with ذخیره (Save) or exit with انصراف (Cancel).
- Create an organization. Go to «مدیریت ساختار» ← «سازمانها» (« » ← «» (Structure Management → Organizations)) and click افزودن سازمان. The "New Organization" page has five tabs: مرور کلی (Overview), موقعیت و نقشهها (Location and Maps), اطلاعات حقوقی و مالی (Legal and Financial Information), ساختمانها, and اسناد و رسانهها (Documents and Media). On the "Overview" tab, the "Basic Information" section includes نام سازمان (Organization Name), وضعیت (Status) (active/inactive), and توضیحات; the "Contact Information" and "Operational Information" sections are optional. Then, on the موقعیت و نقشهها tab, fill in the آدرس (Address) field and, if needed, set the latitude and longitude with انتخاب موقعیت روی نقشه (Select Location on Map). Finally click ایجاد (Create); the message "Organization created successfully" is shown.
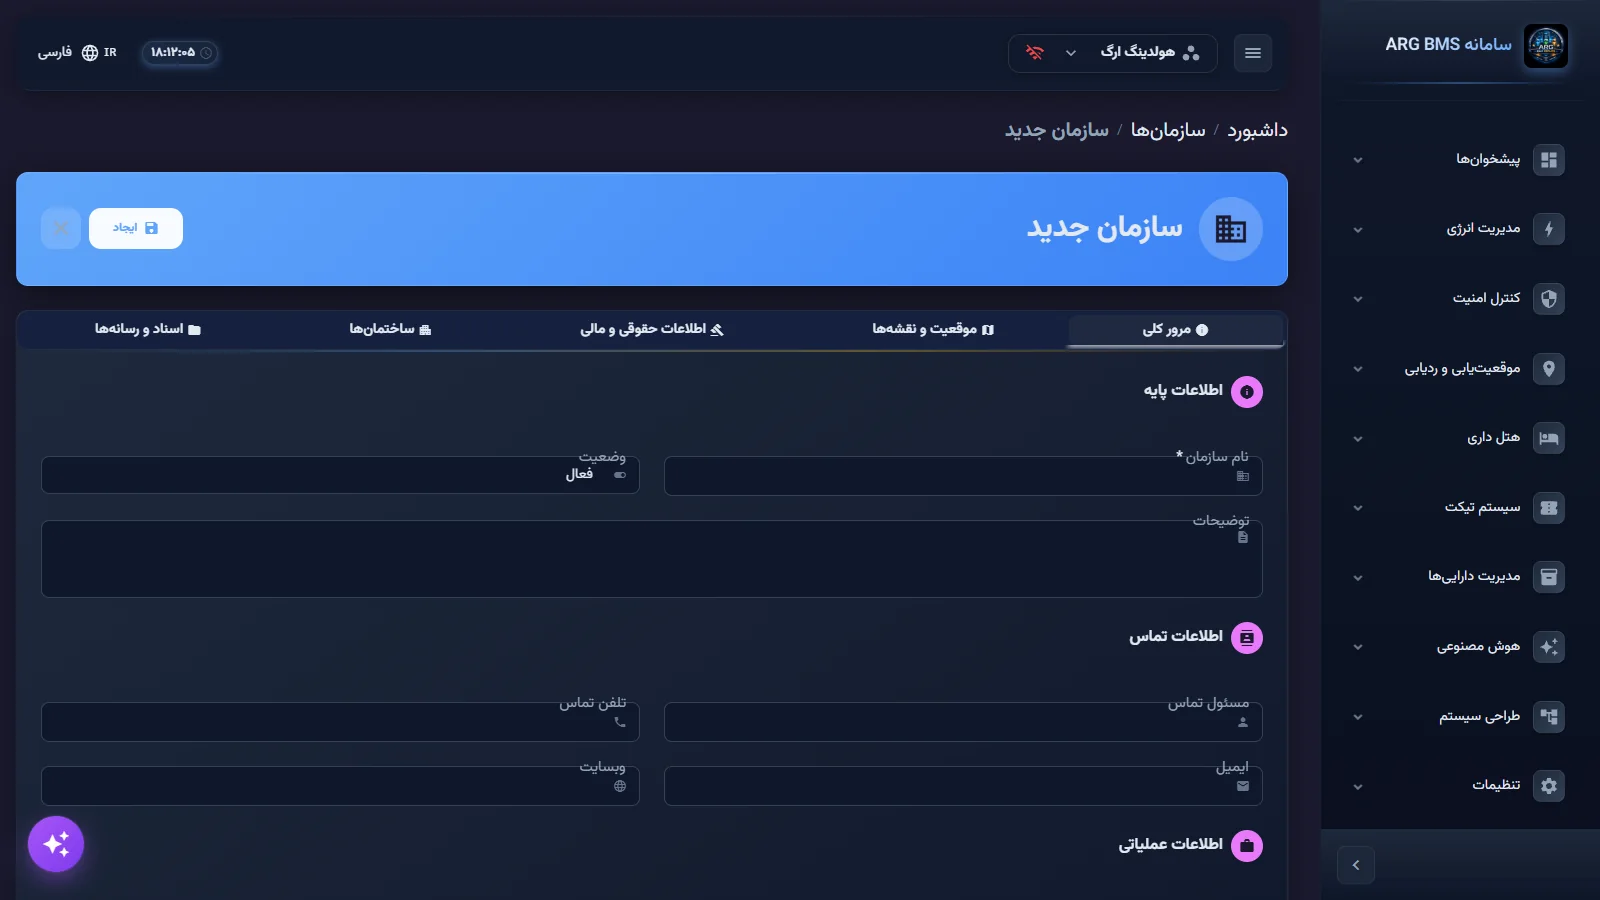
New Organization · The five tabs at the top of the form and the basic information section - Create a building. In ساختمانها, click افزودن ساختمان. On the اطلاعات پایه (Basic Information) tab, choose the سازمان (Organization), enter the نام ساختمان (Building Name), and pick the نوع ساختمان * (* (Building Type *)) from the single-select buttons: commercial, residential, industrial, mixed-use, medical, educational, hospitality, or government. The building address is also required, and the number of floors must be at least 1. The "Status" (active / under maintenance / inactive), "Year Built", "Architect", "Contractor", and "Owner" fields are optional. After saving, the message "Building created successfully" is shown.
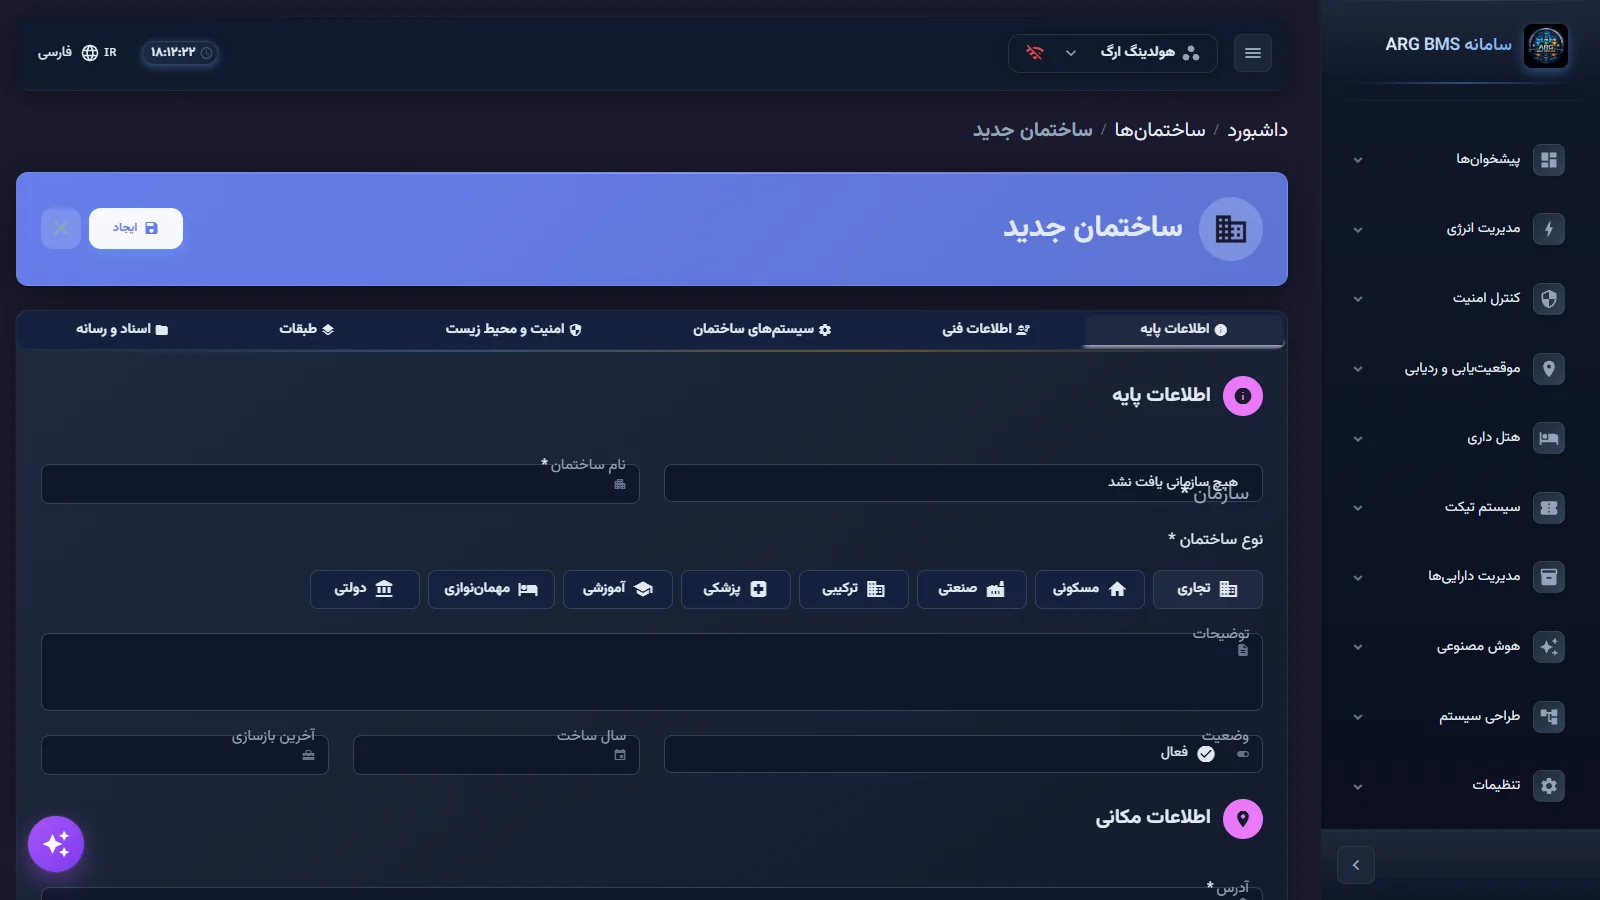
New Building · Organization selection and building-type buttons on the Basic Information tab - Define the floors. In طبقات, create a new floor. Fields: ساختمان (Building), شماره طبقه (Floor Number), نام طبقه (Floor Name) (e.g., "First Floor, Ground Floor"), and نوع طبقه (Floor Type) (office, residential, parking, utility, storage, commercial, lobby, rooftop). The floor-number hint reads: "Positive for floors above ground, negative for basements." So enter the first basement as
-1. The physical specs "Floor Area", "Floor Height", and "Maximum Capacity" are optional.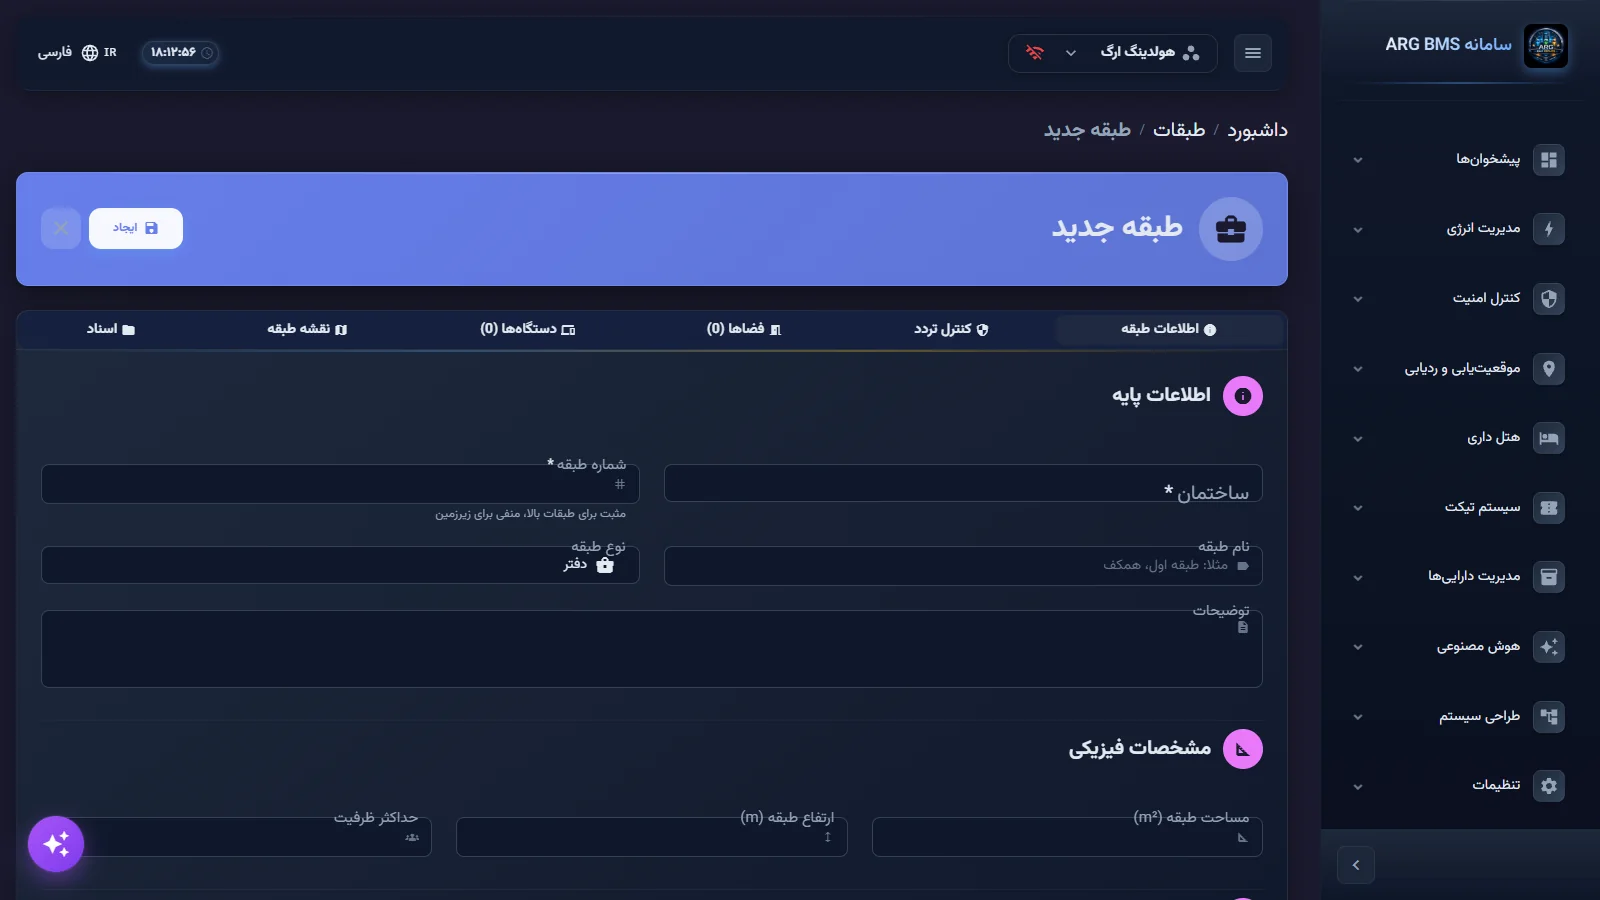
New Floor · The floor-number field and the floor-type list - Create the spaces. In فضاها, create a new space. Select the طبقه (Floor) and enter the شماره فضا (Space Number), نام فضا (Space Name), and نوع فضا (Space Type). The space-type list is searchable and has options such as "office", "server room", "data center", "meeting room", and "UPS". مساحت (Area) must be greater than zero. In the "Meter Configuration" section, you can record meter point IDs in the ENID کنتور برق (ENID (Electricity Meter ENID)), ENID کنتور آب (ENID (Water Meter ENID)), and ENID کنتور گاز (ENID (Gas Meter ENID)) fields so the space's energy report is fed from these same points (the ENID structure is covered in lesson B6). The success message is "Space created successfully".
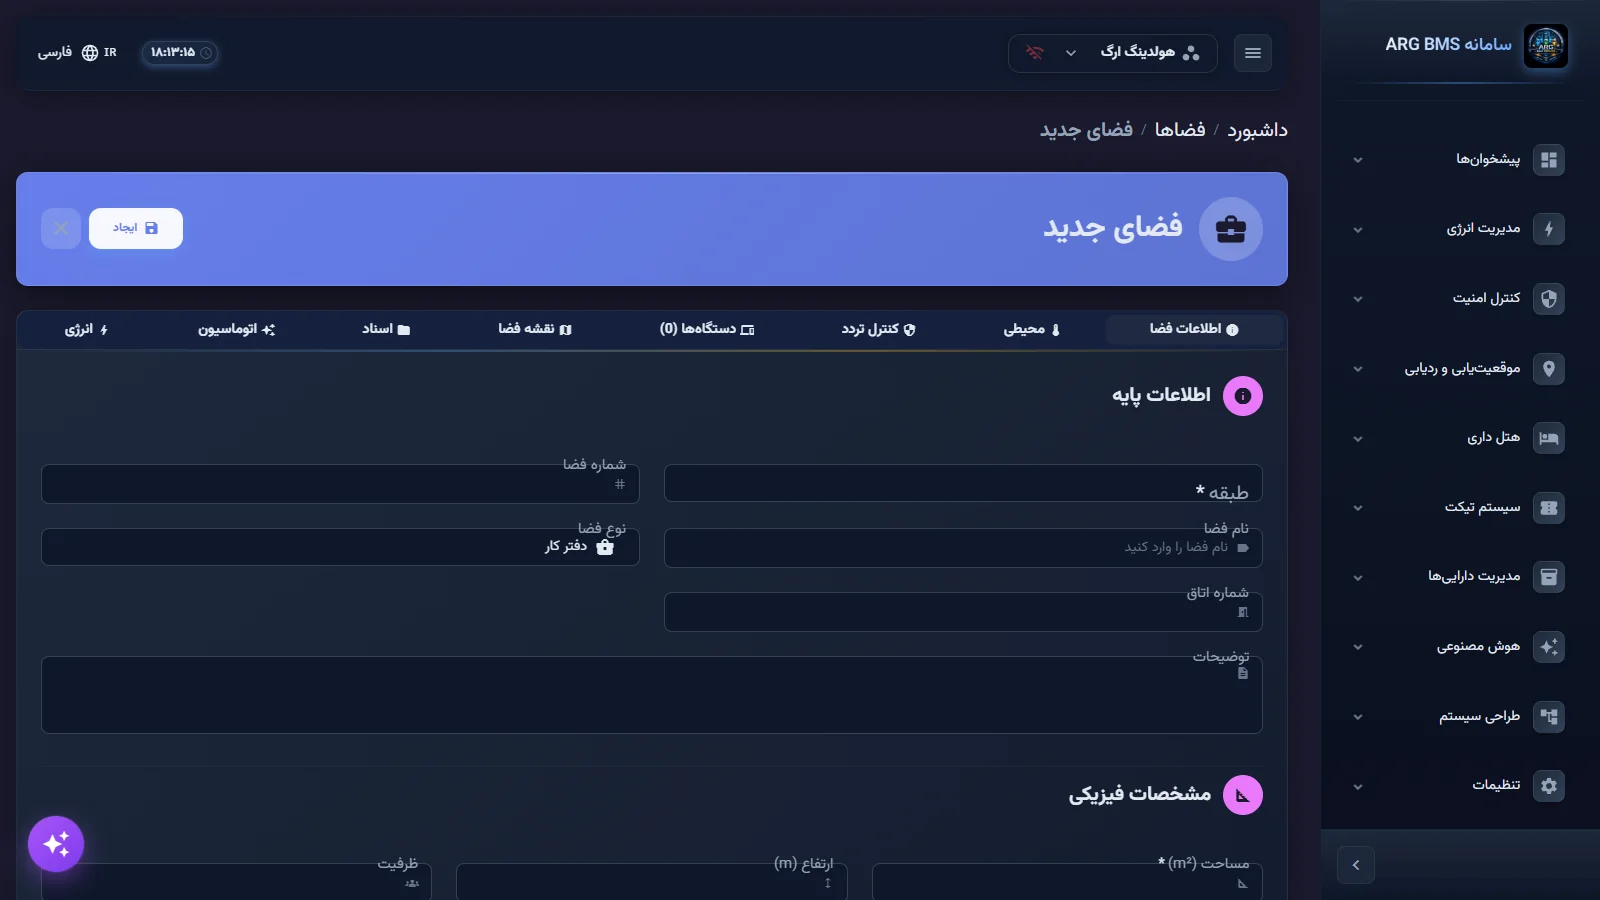
New Space · The floor, space-type, and area fields - Prepare device groups. In گروه دستگاهها, use گروه جدید (New Group) to build working categories (for example, energy, lighting, security). When defining a device, you will pick the group alongside the space.
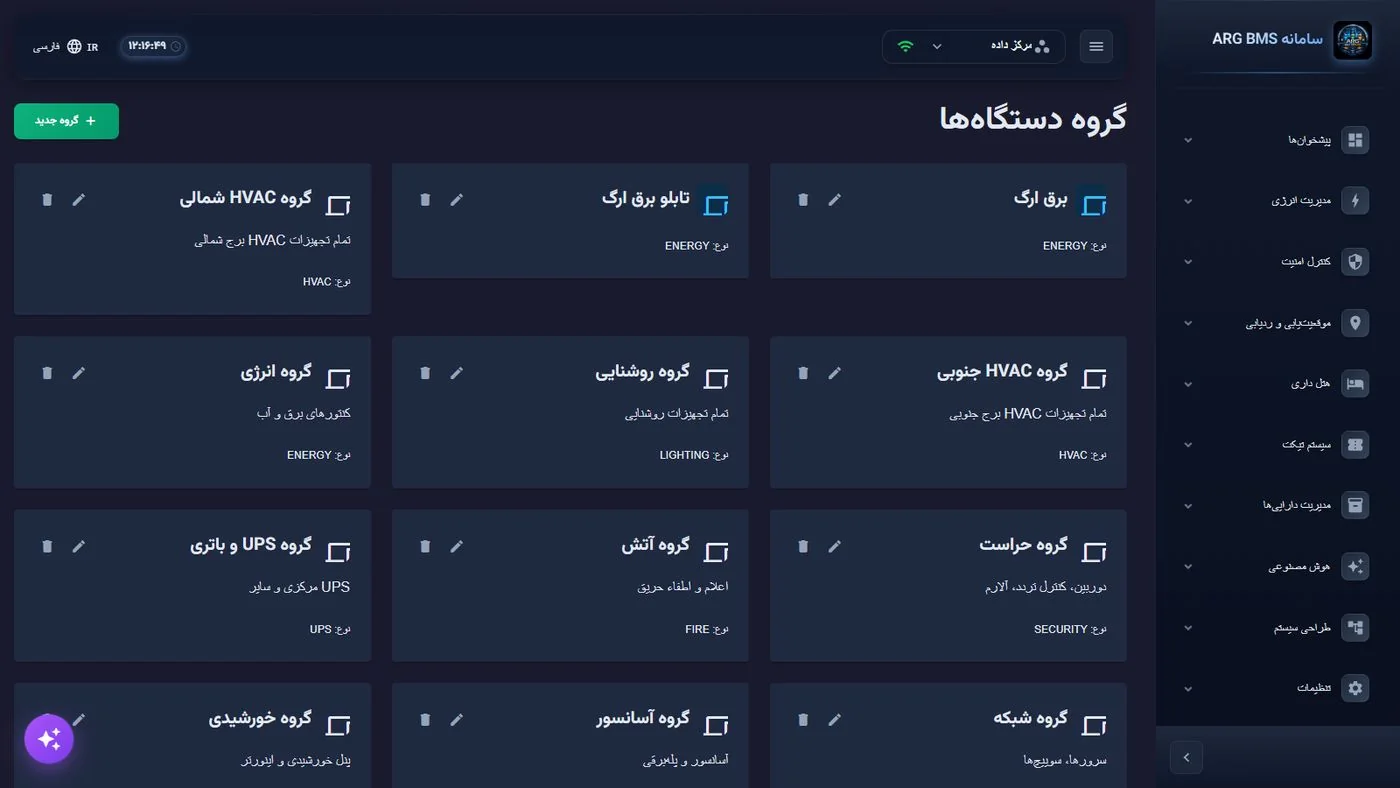
Device Groups · Each card shows the group's name, description, and type
Tips and common mistakes
- Until an organization exists, a building cannot be created. In that case, the Buildings page shows the message "No organization found" and the رفتن به سازمانها (Go to Organizations) button.
- Address is required for both the organization and the building. Messages: "Name is required" and "Address is required".
- If a space's area is zero or empty, saving fails and the message "A valid area is required" appears under the area field; fix the area value.
- The ساختمانها tab on an organization and the طبقات tab on a building are disabled until the first save. Save first, then view the sub-items from that same tab.
- Geographic coordinates must be valid; otherwise the message "Invalid latitude" or "Invalid longitude" is shown.
Summary
- Build order: project ← organization ← building ← floor ← space; "organization" takes the place of "site".
- Key required fields: organization name and address; building's organization, name, type, and address; floor's building and floor number; space's floor and area greater than zero.
- Basement numbers are entered as negative.
- Device groups are a parallel category, not a spatial level.
Hands-on exercise on the live demo
On the public demo (project "ARG Holding"), do not modify or delete any existing data.
- Go to مدیریت پروژهها (Project Management) and note the numbers on the six stat cards.
- In ساختمانها, open a building and count its tabs; you should see six tabs.
- In فضاها, start a new space named "Exercise — your name", leave the area at 0 and observe the error message; then set the area to 20. If the demo account did not allow saving, stop at the preview step. If it saved, delete that practice space at the end.
Lesson check
Answer at least 3 of 4 correctly to pass.
- 1. Which is the correct spatial hierarchy order?
- 2. Which field is required to save a space?
- 3. How is the number of the first basement floor entered?
- 4. What is a "device group"?