Adding equipment and using the equipment catalog
Define a device from the catalog or as a custom device, assign it to a space and group, and complete the basic connection settings.
«طراحی سیستم» ← «مدیریت ساختار» ← «دستگاهها»؛ مرجع مدلها: «تنظیمات» ← «کاتالوگ تجهیزات» — «طراحی سیستم» ← «مدیریت ساختار» ← «دستگاهها»؛ مرجع مدلها: «تنظیمات» ← «کاتالوگ تجهیزات» — System Design → Structure Management → Devices; model reference: Settings → Equipment Catalog
A device is the primary unit of connectivity: every data point belongs to a device, and every device is read through one or more protocols. The fastest and most reliable way to define one is to pick a model from the equipment catalog; in that case the brand, model, default port, and list of data points come from the model's profile. For equipment that is not in the catalog, the "custom device" path exists.
Get to know the page
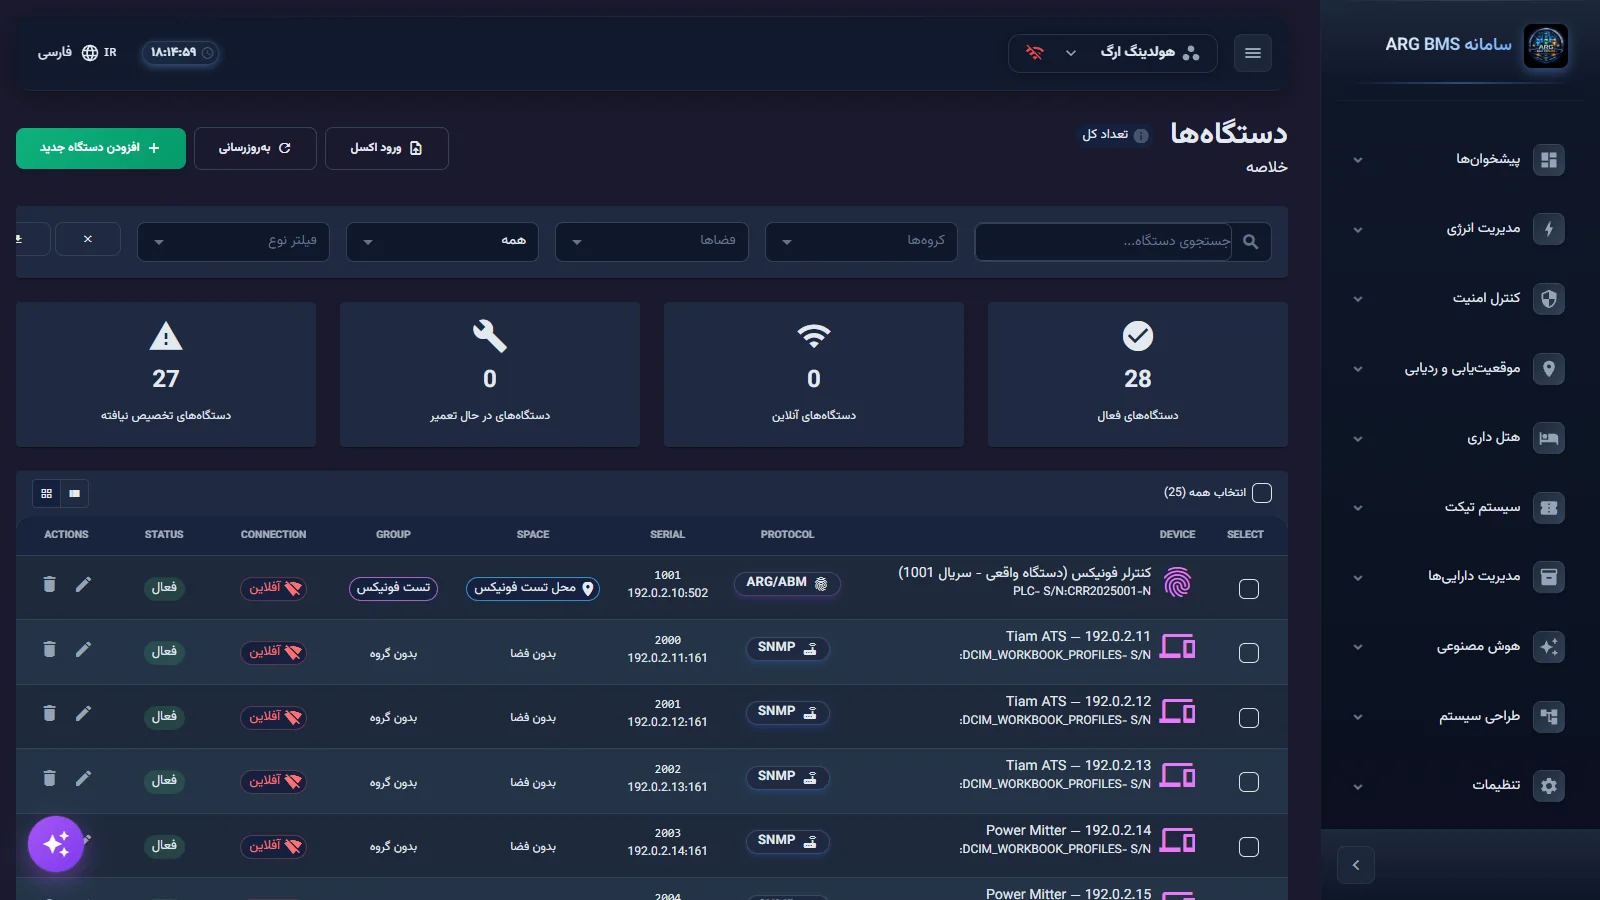
The دستگاهها (Devices) page lists all of the project's equipment.
| Section | Purpose |
|---|---|
| افزودن دستگاه جدید (Add New Device) | Opens the "Define New Device" form |
| ورود اکسل (Excel Import) | Bulk device definition from a file |
| Filters | Search ("Search device..."), گروهها (Groups), فضاها (Spaces), فیلتر وضعیت (Status Filter) (all, online, offline, active, inactive, under maintenance), and فیلتر نوع (Type Filter) |
| Cards | دستگاههای فعال (Active Devices), دستگاههای آنلاین (Online Devices), دستگاههای در حال تعمیر (Devices Under Maintenance), دستگاههای تخصیص نیافته (Unassigned Devices) |
| Views | نمای جدولی (Table View) and نمای کارتی (Card View) |
| Multi-select | Selecting rows shows the انتخاب شده (Selected) button with the options "Assign to Space", "Export Selected Items", and "Delete Selected Items" |
The table's column headers are in English: SELECT, DEVICE, PROTOCOL, SERIAL, SPACE, GROUP, CONNECTION, STATUS, ACTIONS.
The "Define New Device" form (called "Edit Device" when editing) has these tabs: اطلاعات عمومی (General Information), موقعیت و فضا (Location and Space), تنظیمات اتصال (Connection Settings), تنظیمات پیشرفته (Advanced Settings), پروتکلها (Protocols). The SNMP tab is shown only when the catalog model has SNMP or SNMP is turned on, and the پایش و گزارش (Monitoring and Reporting) tab is only added when editing an already-saved device.
Step by step
- Open the form. In "Devices", click افزودن دستگاه جدید. The form opens on the اطلاعات عمومی tab, with the "Select Device from Catalog" card at the top.
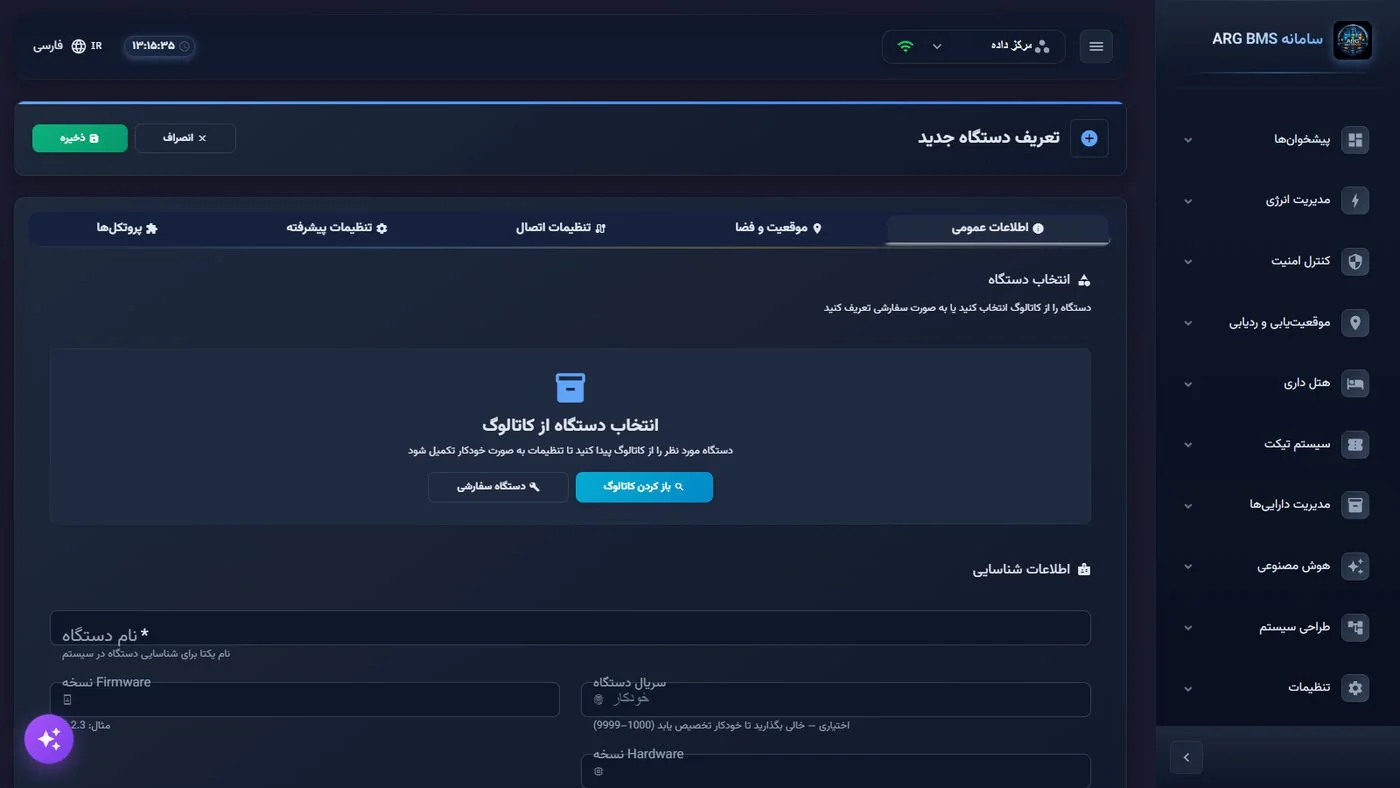
Define New Device · The two buttons "Open Catalog" and "Custom Device" - Select the model from the catalog. Click باز کردن کاتالوگ (Open Catalog) to open the "Device Catalog" window. In the "Quick search across all devices... (name, brand, model)" box, type at least two characters, or first pick a category and narrow it down with فیلتر بر اساس برند (Filter by Brand). Select the model and click انتخاب دستگاه (Select Device).
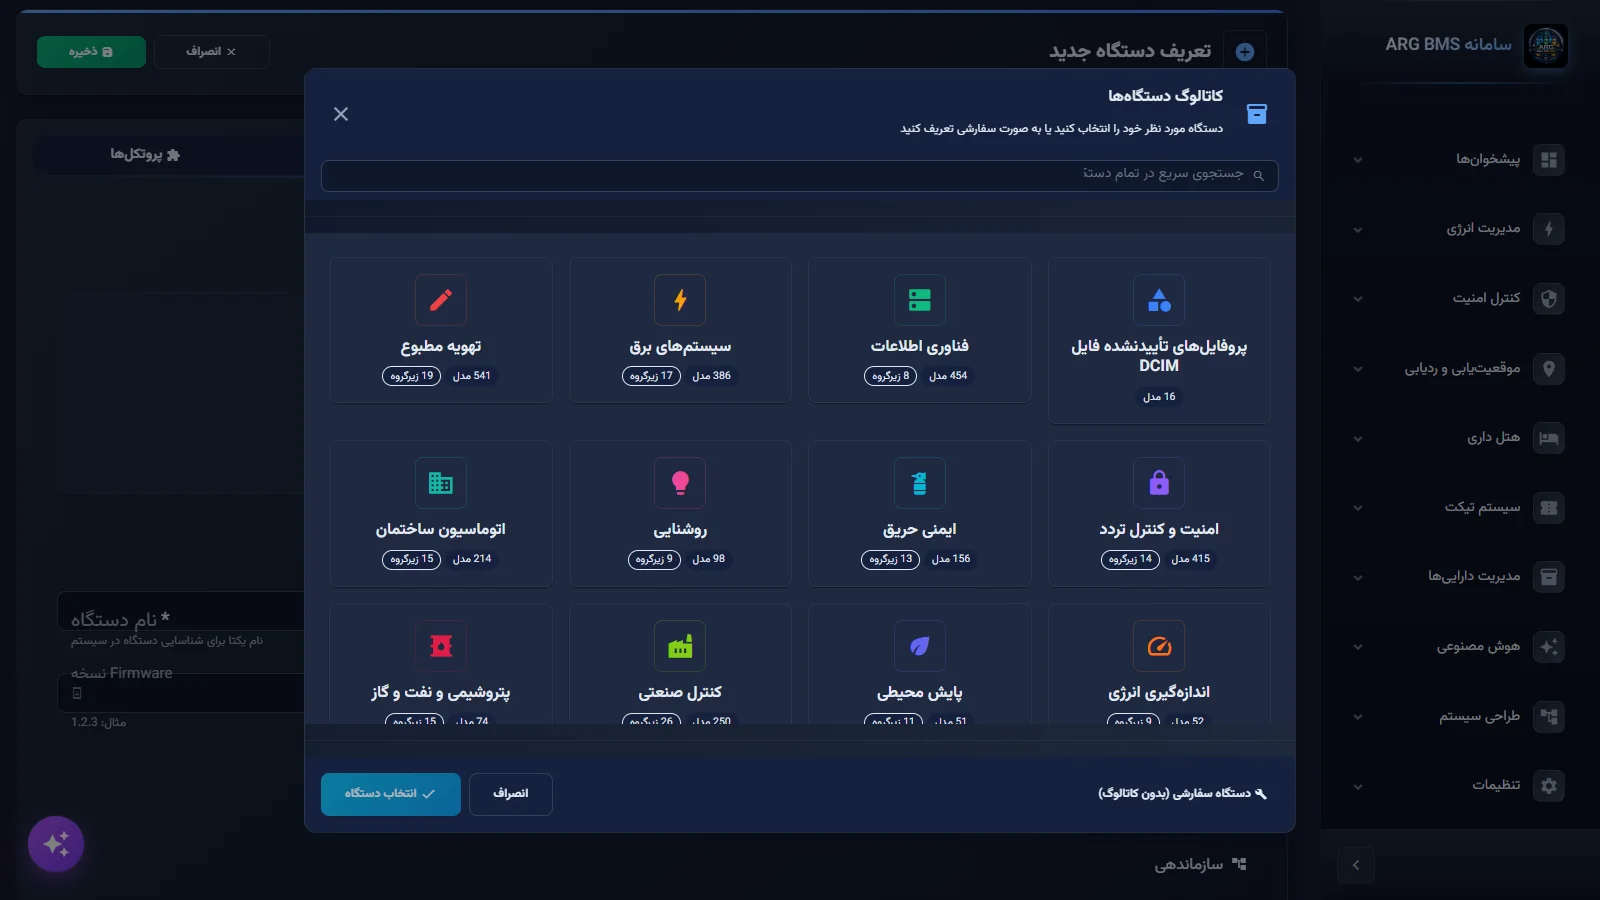
Device Catalog · Global search and the list of categories - Review the profile preview. After a model is selected, a profile preview is built; text such as "Profile ready for review · N explicit SNMP points · configuration only" is shown. Open the مشاهدهٔ نقاط و OIDها (OID (View Points and OIDs)) dropdown and make sure the points you need are in the profile.
- Or define a custom device. If the model is not in the catalog, click دستگاه سفارشی (Custom Device) and enter the سازنده / برند (/ (Manufacturer / Brand)), مدل دستگاه (Device Model), and نوع / دستهبندی (/ (Type / Category)). In this case the data points are built from the protocol (lesson B3).
- Complete the identification information. نام دستگاه (Device Name) is required. سریال دستگاه (Device Serial) is optional; its hint reads: "Optional — leave empty to auto-assign (1000–9999)." The serial is locked after saving ("The serial cannot be changed"). Fill in نسخه Firmware (Firmware (Firmware Version)), نسخه Hardware (Hardware (Hardware Version)), گروه دستگاه (Device Group), وضعیت دستگاه (Device Status) (default active), and توضیحات (Description) as needed.
- Set the space. On the موقعیت و فضا tab, select the ساختمان (Building), طبقه (Floor), and فضا (Space) in order; each list is populated based on the previous choice. GPS position via انتخاب روی نقشه (Select on Map) is optional (latitude between -90 and 90, longitude between -180 and 180).
- Enter the connection settings. On the تنظیمات اتصال tab, نوع رسانه ارتباطی (Communication Media Type) defaults to "Ethernet (RJ45)". For network media, enter آدرس IP (IP (IP Address)), پورت (Port), and آدرس MAC (MAC (MAC Address)). Default timing: بازه نمونهبرداری (Sampling Interval) 60 seconds, زمان وقفه (Timeout) 30, and تعداد تلاش مجدد (Retry Count) 3.
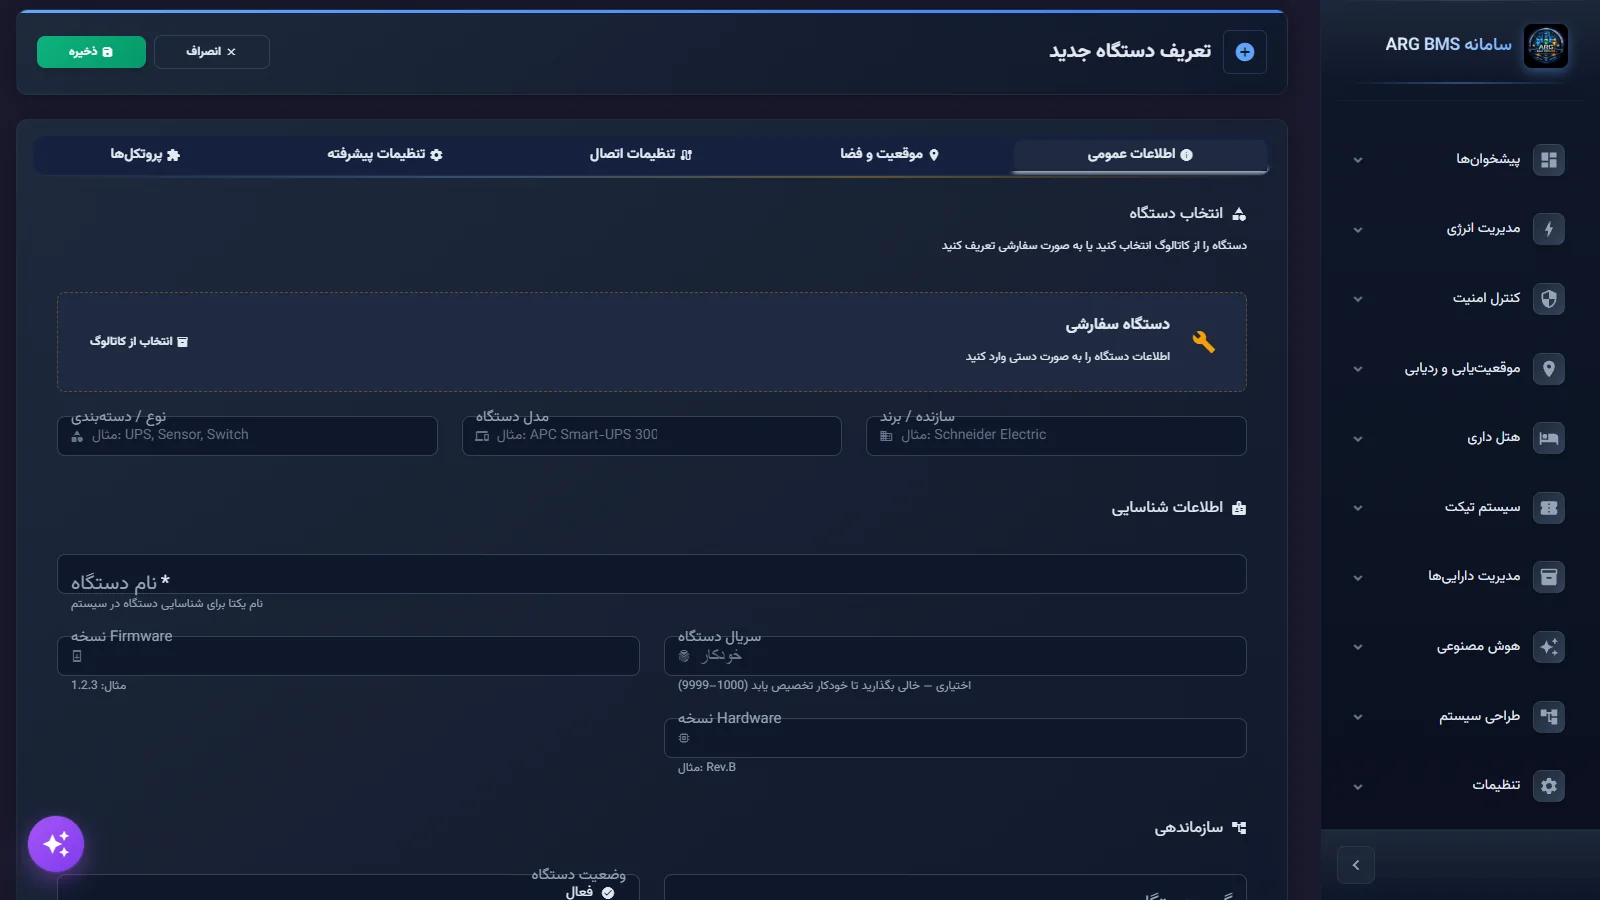
Connection Settings · Media type, network address, and timing - Review the advanced settings. Four toggles: ثبتِ Telemetry (Telemetry (Telemetry Logging)) (on), رمزنگاریِ ارتباط (Connection Encryption) (on), حالتِ Debug (Debug (Debug Mode)) (off), and حالتِ نگهداری (Maintenance Mode) (off). Turning on maintenance mode takes the device out of periodic polling. In the "Custom Fields" section you can record کلید (Key) and مقدار (Value) pairs with افزودن (Add).
- Enable the protocol and save. On the پروتکلها tab, turn on the relevant protocol section (details in lessons B3 through B5) and click ذخیره (Save). After a successful save you return to the device list.
Bulk import from Excel
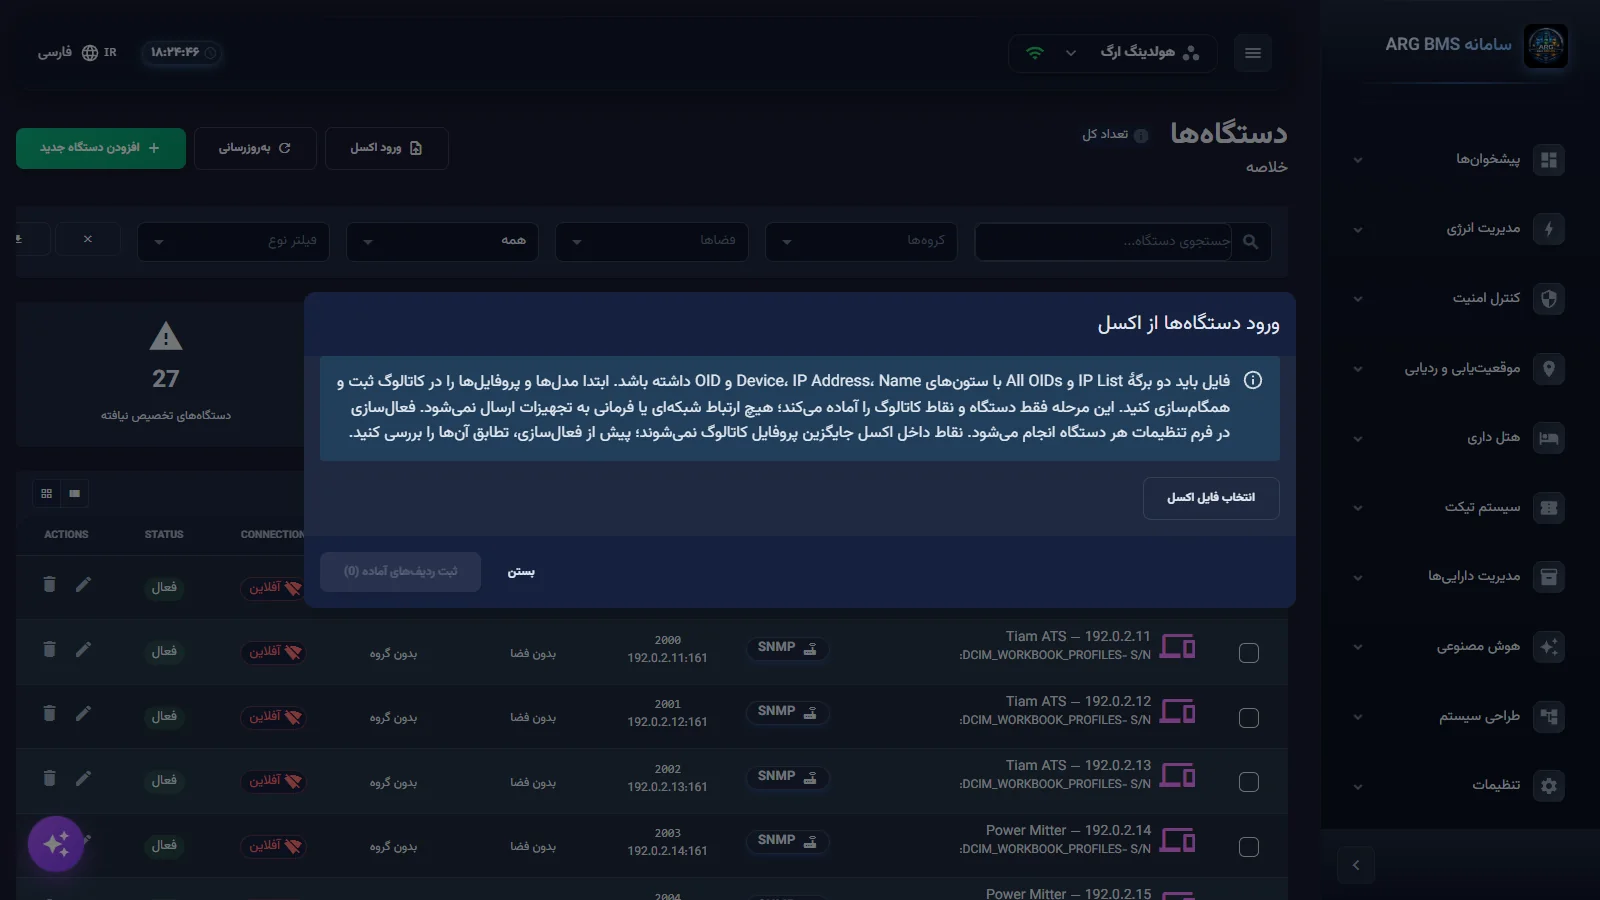
For dozens of devices of the same type, click ورود اکسل. The "Import Devices from Excel" window accepts an .xlsx file with two sheets, "IP List" and "All OIDs"; the first sheet has the columns Name, Device, IP Address, and the second has the OID column. Load the file with انتخاب فایل اکسل (Select Excel File) and read each row's result; the message "Device N is ready; connection not verified" means the definition succeeded but connectivity has not yet been tested. Then click ثبت ردیفهای آماده (N) ((N) (Register Ready Rows (N))). The same window's help text stresses that this step only prepares the device and catalog points and sends no network communication or command to the equipment; activation happens in each device's settings form.
Equipment catalog
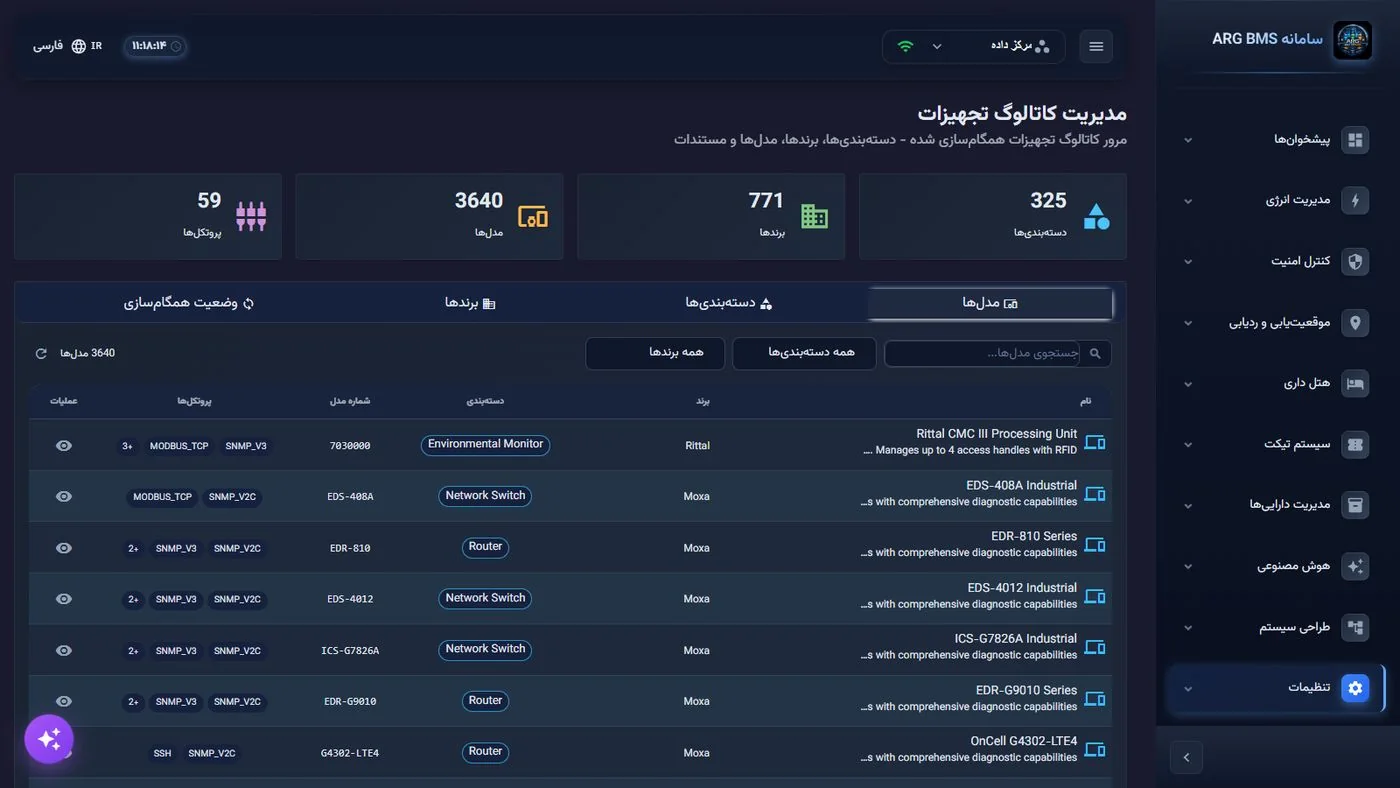
At «تنظیمات» ← «کاتالوگ تجهیزات» («» ← « » (Settings → Equipment Catalog)), the "Equipment Catalog Management" page opens with the tabs مدلها (Models), دستهبندیها (Categories), برندها (Brands), and وضعیت همگامسازی (Sync Status). The protocols column shows how each model is read. This page is for browsing and comparison, and new models are not defined here; a new model is added through the catalog support team.
Tips and common mistakes
- A duplicate serial is rejected: "A device with this serial has already been registered." Serial capacity is 9999.
- If the profile preview is not ready yet, saving stops: "The profile preview is not ready yet; reselect and review the model."
- If you see the message "Device N was saved, but connection setup did not complete…", save again; retrying updates the same device and does not create a duplicate.
- The "Unassigned Devices" card counts devices without a group, not without a space. To find devices without a space, use the فضاها filter.
- The message "No project is selected. Please select a project first." means you must pick the project from the top of the page before defining anything.
Summary
- Preferred path: باز کردن کاتالوگ ← select model ← review points ← complete the form ← save.
- Serials run 1000–9999; left empty, one is auto-assigned, and it locks after saving.
- Set the space and group at the same time you define the device.
- For large volumes, use Excel import with the profile-bundle template.
Hands-on exercise on the live demo
On the public demo, do not save or delete anything.
- In دستگاهها, click افزودن دستگاه جدید and then باز کردن کاتالوگ.
- Search for "UPS", select a UPS model, and open the مشاهدهٔ نقاط و OIDها list. Note the number of points.
- Open the form's tabs one by one and write down the "Connection Settings" defaults; then click انصراف (Cancel).
- At «تنظیمات» ← «کاتالوگ تجهیزات» ← «مدلها» («» ← « » ← «» (Settings → Equipment Catalog → Models)), find the same model and compare its protocols with the form's preview.
Lesson check
Answer at least 3 of 4 correctly to pass.
- 1. What is the allowed range for the device serial?
- 2. What happens if "Device Serial" is left empty?
- 3. What does selecting a model from the catalog automate?
- 4. When is the "Monitoring and Reporting" tab shown?