Building a 3D Scene
Build a 3D dashboard, place and adjust objects from the library, bind them to data and commands, and configure and save the scene's lighting, camera, and background.
«طراحی سیستم» ← «طراحی داشبورد» ← «داشبوردهای من» ← «داشبورد جدید» (نوع «داشبورد 3D») ← «طراح سهبعدی» — «طراحی سیستم» ← «طراحی داشبورد» ← «داشبوردهای من» ← «داشبورد جدید» (نوع «داشبورد 3D») ← «طراح سهبعدی» — «طراحی سیستم» ← «طراحی داشبورد» ← «داشبوردهای من» ← «داشبورد جدید» (نوع «داشبورد 3D») ← «طراح سهبعدی» — System Design → Dashboard Design → My Dashboards → New Dashboard (type "3D Dashboard") → 3D Designer
A 3D dashboard recreates a real space along with its equipment: a plant room, a server room, a substation, or a fuel station. In this lesson you build a 3D dashboard and, in the 3D designer, place objects from the library, move, rotate, and resize them, bind them to points and commands, set up the scene's lighting and camera, and load a custom model if needed.
Get to know the screen
The 3D designer opens with the title طراح سهبعدی · شناسه (3D Designer · ID) and shows the save status at the top: طرح ذخیرهشده (Design saved), تغییرات ذخیرهنشده (Unsaved changes), or در حال ذخیره… (Saving…). The main regions are:
| Region | Content |
|---|---|
| Toolbar, first row | جابجایی G (Move (G)), چرخش R (Rotate (R)), اندازه S (Scale (S)) modes; نمای کل (Overview), نمای بالا (Top view), جابجایی دقیق M (Precise move (M)), ابعاد دقیق (Exact dimensions), پیشنمایش داشبورد (Preview dashboard) |
| Toolbar, second row | Save, undo, and redo; drawing tools (wall, rectangle, line/pipe, circle, polygon, ruler); align on the three axes; grouping; perspective, top, front, and side views; grid, snap, and lighting toggles; model upload, JSON import/export, and a scene screenshot |
| Right panel | کتابخانه (Library) and لایهها (Layers) tabs, with a جستجو... (مثلا: pump, چیلر) (Search... (e.g. pump, chiller)) box |
| Left panel | تنظیمات (Settings), ENID, فرمان (Command), صحنه (Scene), and کابل (Cable) tabs |
| Bottom status bar | Object count, view type, current mode, and a key-shortcut hint |
The library holds about 400 items across 24 categories, plus a "Ready-made GLB Models" section. Some categories: basic shapes, building and architecture, HVAC, pumps, tanks, water and piping, electrical, safety and fire, sensors, instrumentation and meters, switches and controls, server-room DCIM, airport, hospital, refinery and petrochemical, and fuel station. Models you upload yourself appear in a separate "User Custom Models" section.
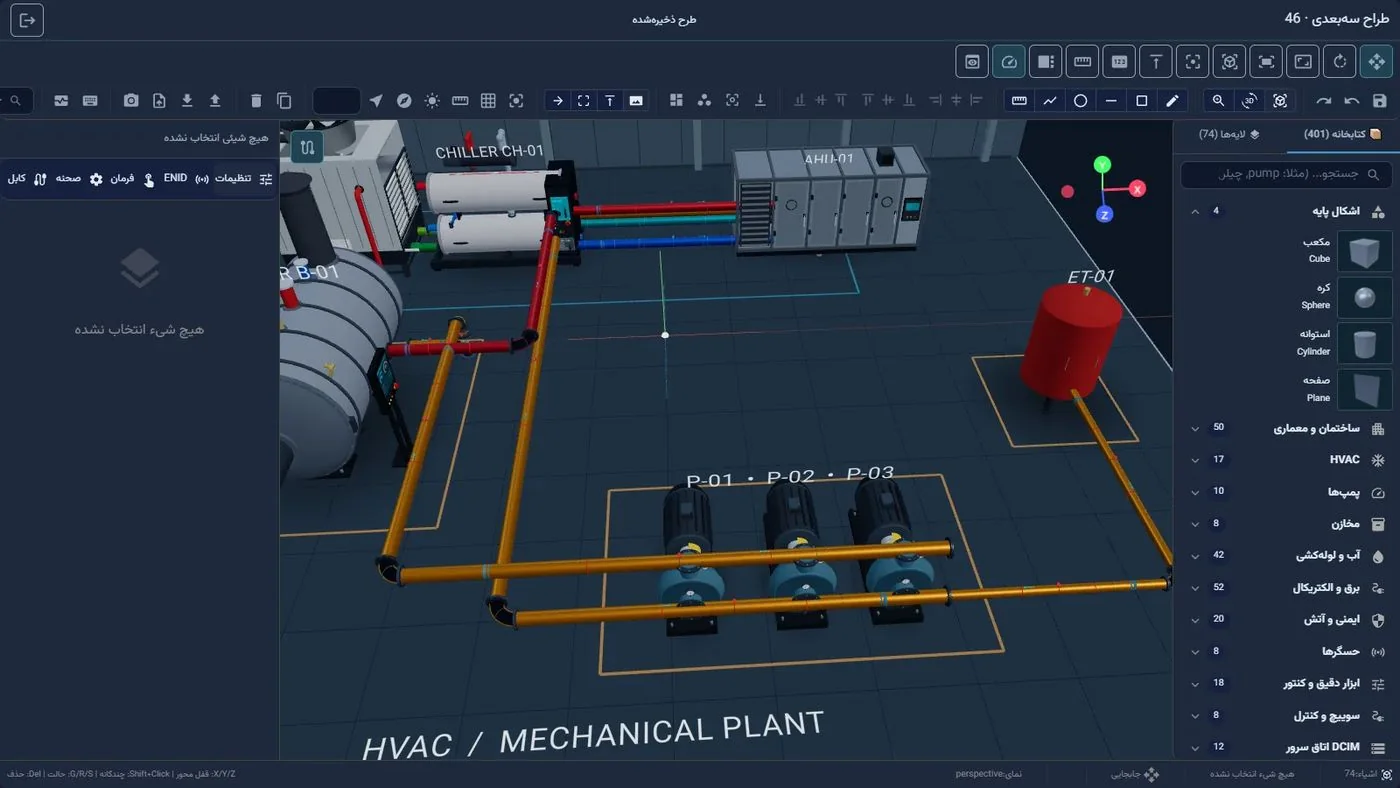
Step by step
- Create the 3D dashboard. Under «طراحی سیستم» ← «طراحی داشبورد» ← «داشبوردهای من» (System Design → Dashboard Design → My Dashboards) click داشبورد جدید (New Dashboard), set نوع داشبورد * (Dashboard Type *) to داشبورد 3D (3D Dashboard), and click ایجاد داشبورد (Create Dashboard). Then click its card in the داشبوردهای سهبعدی (3D Dashboards) group to open the 3D designer.
- Build the floor and walls. From the "building and architecture" category, add a floor or wall with a single click, or use the ترسیم دیوار (دستی) (Draw wall (manual)) tool to draw one (click to start, click to finish). Set exact dimensions with ابعاد دقیق and the "Width X", "Height Y", and "Depth Z" fields, then click اعمال ابعاد (Apply dimensions).
- Add equipment. From the library, for example click a chiller under "HVAC" or a rack under "server-room DCIM". The object is created and selected at the scene's origin. To find items quickly, type the name in the search box.
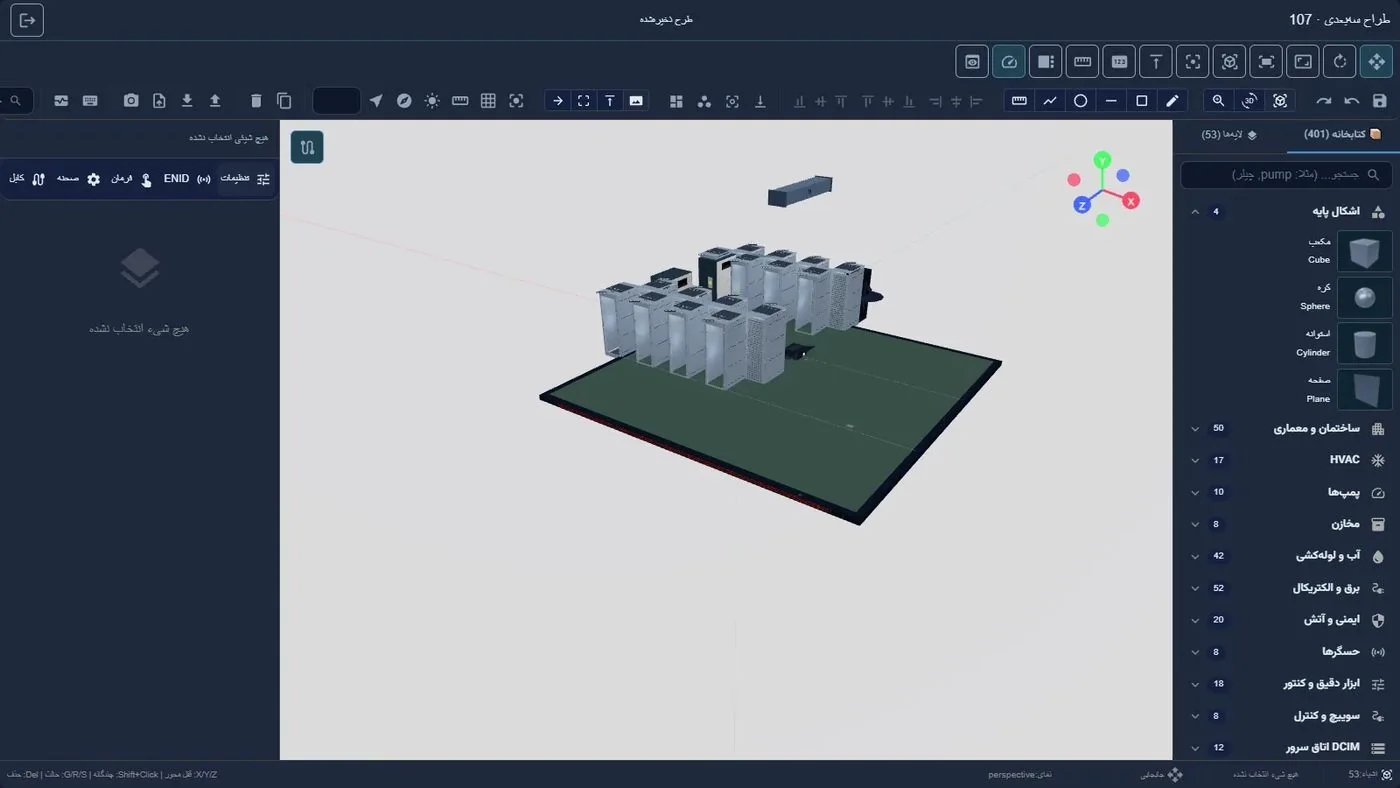
Server room · racks added from the "server-room DCIM" category on the floor, and the axis gizmo in the corner of the scene - Move the object. Pick a mode with G (move), R (rotate), or S (scale) and drag the handle on the object. To constrain movement to one axis, press X, Y, or Z. For exact values use جابجایی دقیق M or the موقعیت (Position), چرخش (Rotation), and مقیاس (Scale) fields in the تنظیمات tab. Arrow keys move the object by 0.1 units, or 1 unit with Shift. چسباندن به کف (Snap to floor) drops the object onto the ground. Grid snapping is on by default (0.25 units for position, 15 degrees for rotation). These keys also work with a non-Latin keyboard layout.
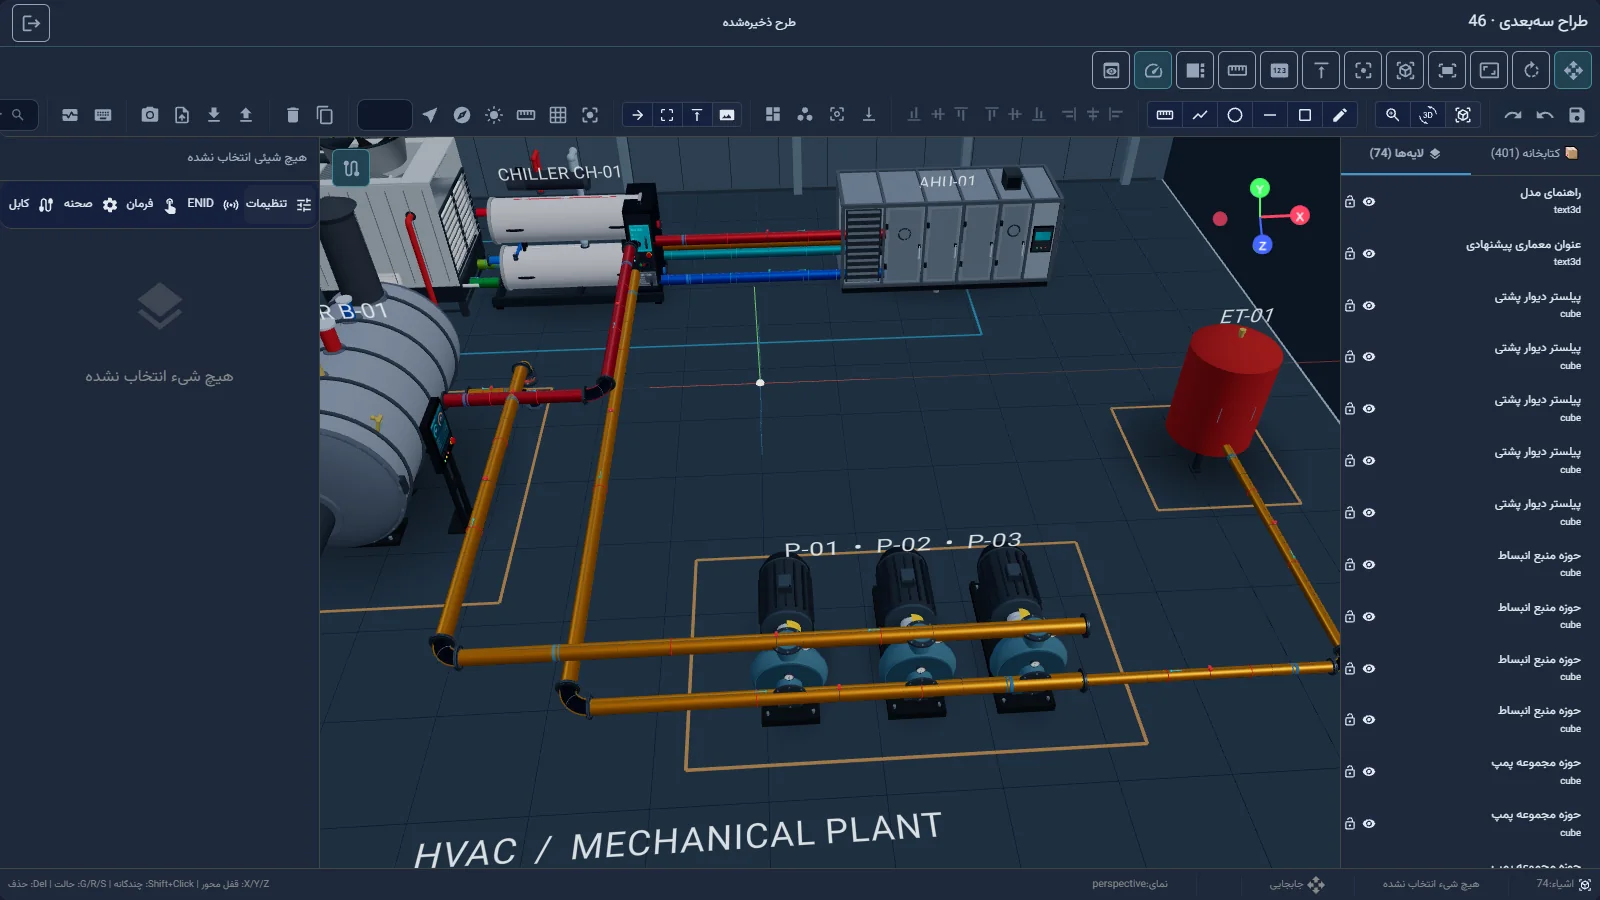
Settings tab · the "Transform" (position, rotation, scale) and "Material" sections for the selected object - Adjust the object's appearance and behavior. In the تنظیمات tab:
- اطلاعات پایه (Basic Info): the object's نام (Name). A clear name makes finding the object in Layers easier.
- مواد (Material): color, metalness, roughness, transparency, and emission.
- لایه (Layer): تعاملی (Interactive), لینک داشبورد (Dashboard link) (jump to another dashboard by clicking the object), and نکته ابزار (Tooltip).
- نمایش (Display): shadow and قفل شده (Locked). A locked object cannot be moved or deleted by accident.
- Arrange several objects together. Shift+Click to select several objects and use an align tool (for example "Align center X"), or group them with Ctrl+G. Grouping needs at least two objects. Ctrl+D duplicates, and Del deletes.
- Bind the object to data. In the ENID tab, click افزودن ENID (Add ENID) to pick a point — the same point-selection dialog from lesson B9 opens. Then, under اتصال داده (Binding) (Data Binding):
- Turn on فعالسازی اتصال (Enable binding).
- Set the خصوصیت هدف (Target property), for example رنگ (Color) (Color), سطح پر شدن (Fill level) for a tank, دور موتور (RPM) (RPM) for a fan, or نمایش.
- Choose the نوع نگاشت (Mapping type): مقادیر گسسته (Discrete) (Discrete values) for specific values like on/off, بازه (Range) (Range) for a continuous mapping such as a 0-100 level, or آستانه (Threshold) (Threshold). In threshold mode, each row applies once the ENID's value is greater than or equal to the threshold.
- Use تست مقدار (Test value) to enter a sample value and see the result on the object.
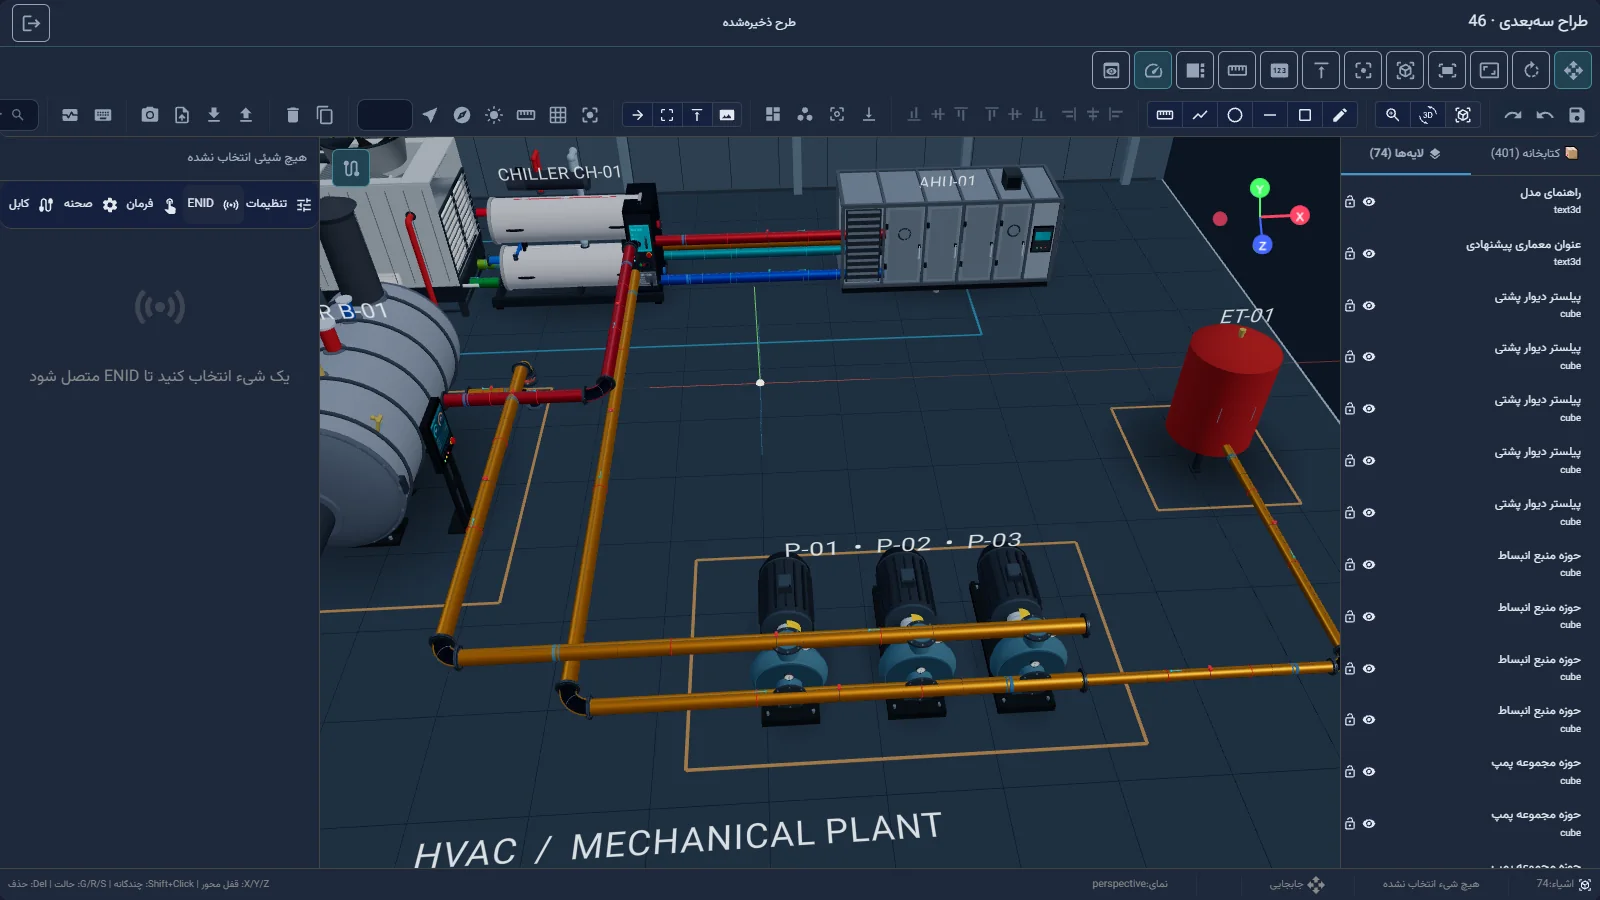
Data binding · "Target property", "Mapping type", and "Test value" - Set up a click command. In the فرمان tab, turn on فعالسازی فرمان با کلیک (Enable click command). Set نوع فرمان (Command type) to Toggle (روشن/خاموش) (Toggle (on/off)), ارسال مقدار ثابت (Send fixed value), افزایش مقدار (Increment value), or لینک به داشبورد (Link to dashboard), pick the ENID هدف فرمان (Target command ENID), and keep نمایش تأیید قبل از ارسال (Show confirmation before sending) turned on.
- Set up the scene. In the صحنه tab:
- پسزمینه (Background): a plain color, a gradient, or a skybox; plus fog if needed.
- دوربین (Camera): field of view (FOV) and near/far distance.
- نورپردازی (Lighting): click افزودن نور (Add light) to add ambient, directional, point, or spot lighting, and set each light's color, intensity, position, and shadow.
- رندرینگ (Rendering) and شبکه (Grid).
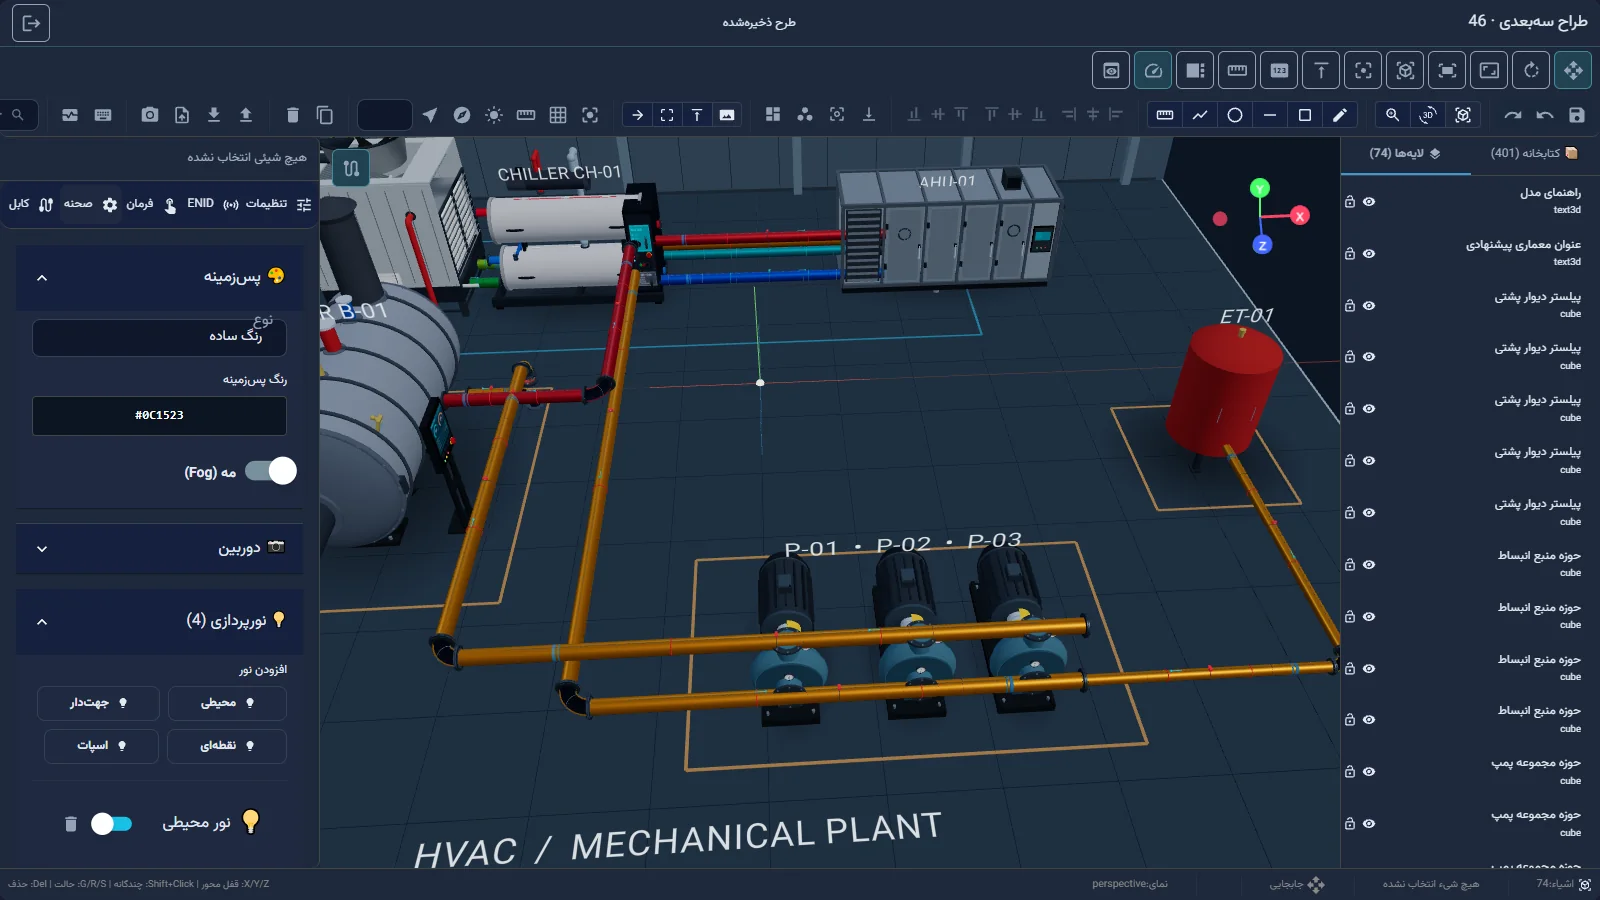
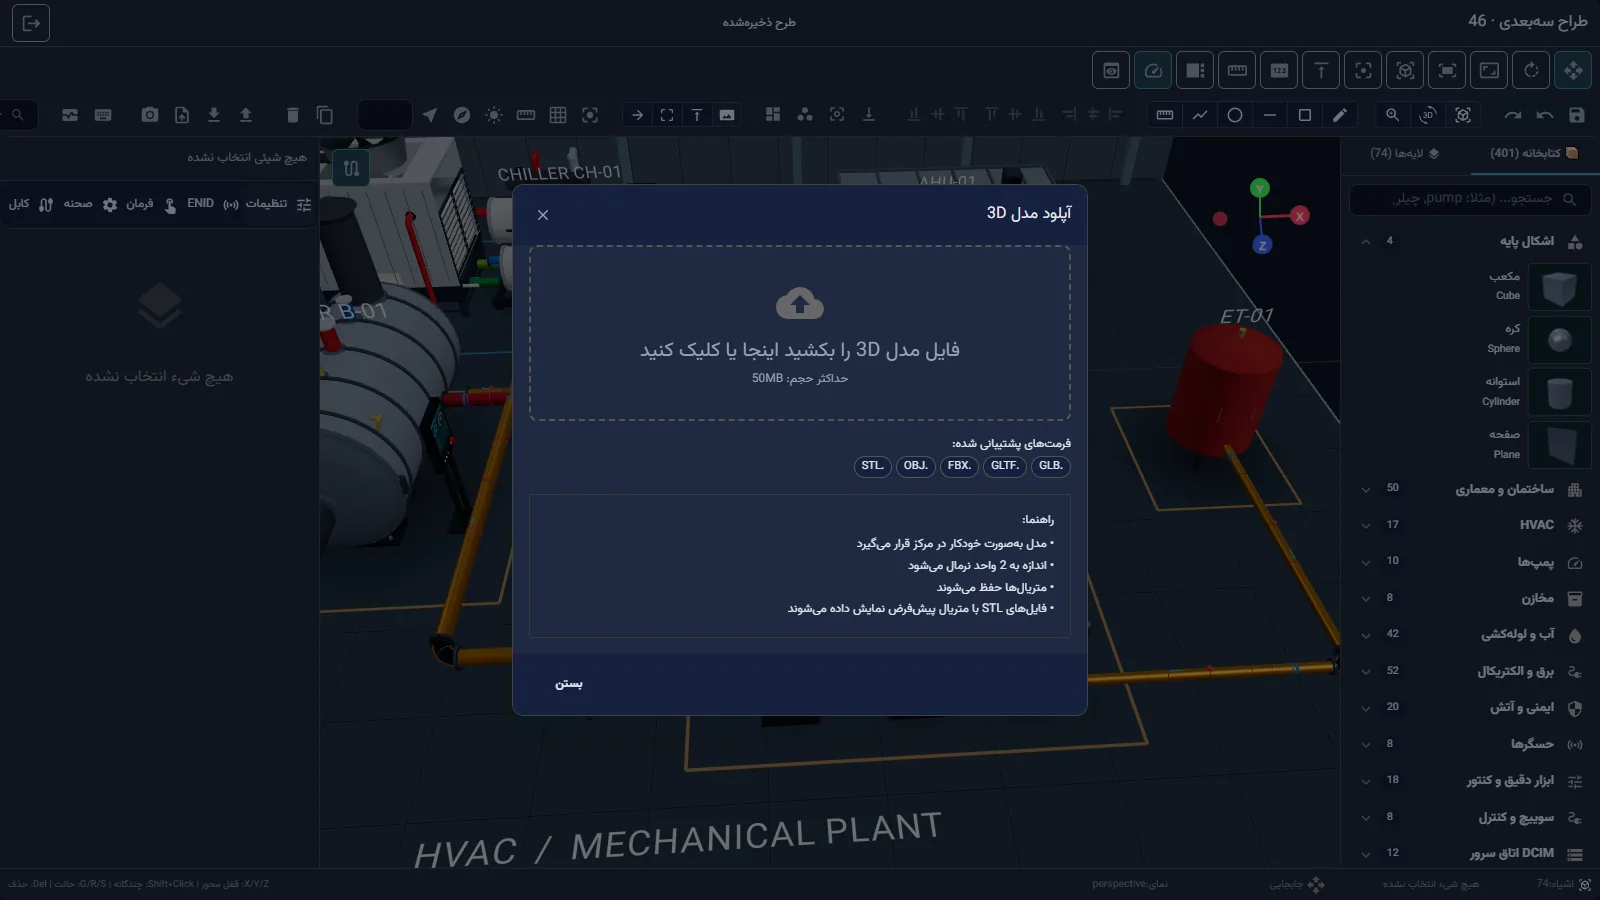
Scene tab · the background, camera, and lighting sections - Load a custom model if needed. Click بارگذاری مدل 3D (Upload 3D Model) and drag the file into the آپلود مدل 3D (Upload 3D Model) window. The maximum size is 50 MB. The model is automatically centered, normalized in size, and keeps its materials. After upload, the message "Model '…' added" appears.
Upload 3D Model · the drop zone and the 50 MB size limit - Save and check the result. Click ذخیره (Ctrl+S) (Save (Ctrl+S)) and confirm the message "3D design saved". Then open the live view with پیشنمایش داشبورد. To leave, use خروج از دیزاینر (Exit Designer); if there are unsaved changes, you are offered ذخیره و خروج (Save and exit), خروج بدون ذخیره (Exit without saving), and ادامهٔ طراحی (Continue designing).
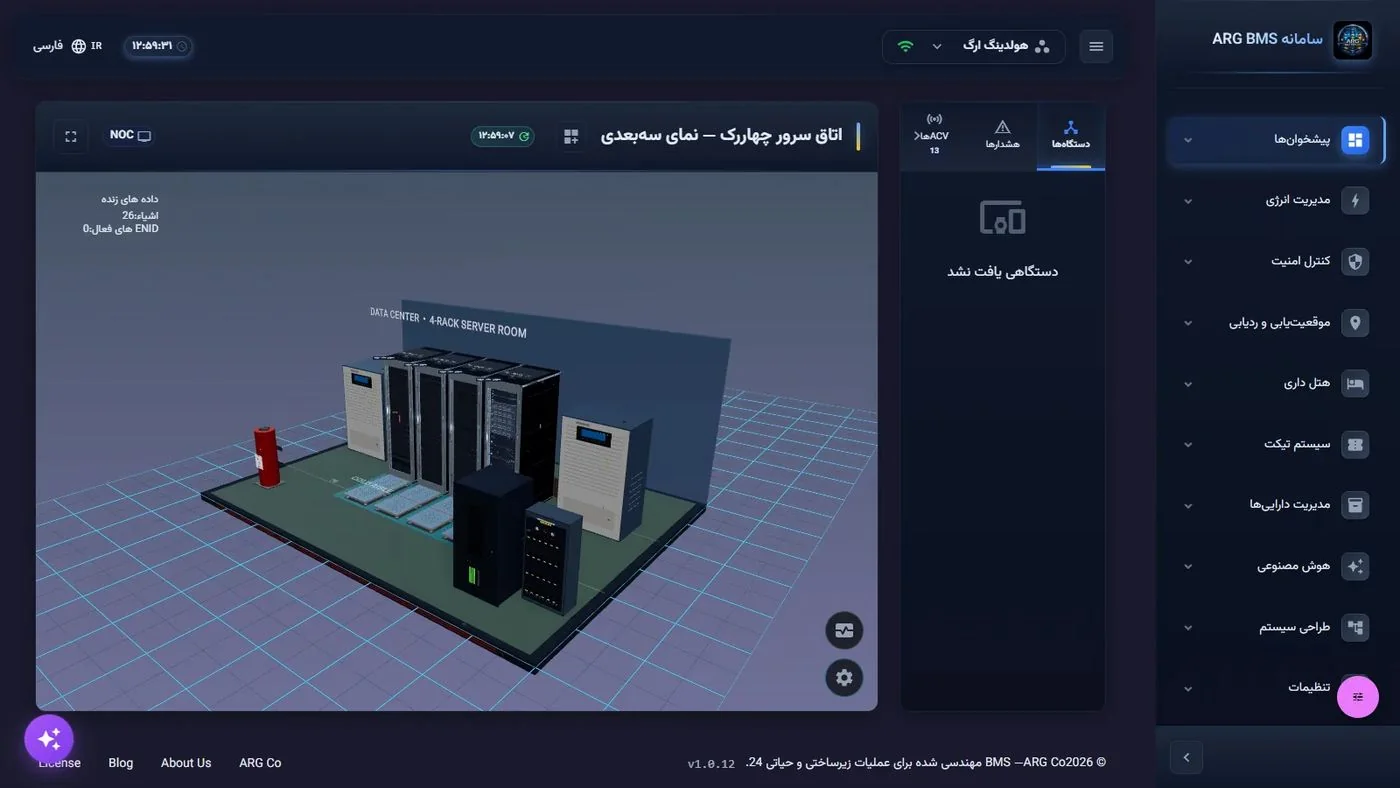
Live view · a server-room scene in the console, with the device list, alarms, and ACVs alongside it
Tips and common mistakes
- The upload window's format list also mentions FBX and STL, but in the current version only GLB, GLTF, and OBJ are actually accepted. Convert models to GLB.
- A locked object cannot be deleted, and the message "Equipment is locked; unlock it first." appears.
- Deleting an object that a pipe or cable is attached to leaves the connected paths dangling; take the system's warning seriously.
- The کیفیت: طراحی روان (Quality: smooth editing) option is for comfortable work while designing; the live view still renders at full quality.
- The library's item count is shown in the tab header (around 400) and grows as you add custom models.
Summary
- A 3D dashboard is created with type "3D Dashboard" and opened in the "3D Designer" by clicking its card.
- The library holds about 400 items; G, R, and S select the move, rotate, and scale modes.
- The "ENID" tab binds an object's properties (color, level, RPM, etc.) to data with discrete, range, or threshold mapping.
- The "Command" tab turns a click on the object into a command, and the "Scene" tab sets lighting, camera, and background.
- Only GLB, GLTF, and OBJ up to 50 MB can be uploaded; save with Ctrl+S and preview with "Preview dashboard".
Hands-on exercise on the live demo
Work on the public demo (bms.argsrv.com, project "ARG Holding"). Do not save or delete existing 3D demo dashboards.
- Create a داشبورد 3D titled "Exercise — your name" and open the 3D designer.
- Place a floor from "building and architecture" and two racks from "server-room DCIM". Select the racks with Shift+Click, align them with "Align center X", and click چسباندن به کف.
- Place a tank from "tanks". In the ENID tab bind a percentage point, set خصوصیت هدف to سطح پر شدن and نوع نگاشت to بازه (Range), and test values of 0 and 100 with تست مقدار.
- In the صحنه tab add a directional light, save, and view the result with پیشنمایش داشبورد.
- Finally, delete the exercise dashboard.
If the demo account does not allow saving, go only as far as the preview stage: complete every step, then exit with خروج از دیزاینر → خروج بدون ذخیره.
Lesson check
Answer at least 3 of 4 correctly to pass.
- 1. What is the keyboard shortcut for rotate mode in the 3D designer?
- 2. Which model format does the current version actually accept for upload?
- 3. In "Threshold" mapping, when is a given row's result applied?
- 4. Where is the camera position that the live view opens with saved?