Users and Roles
Create an "Individual" and a "User Account" for each person, define roles and the org chart, lock, unlock, and reset accounts, and know where access control is actually enforced in practice.
«تنظیمات» ← «کاربران و دسترسیها» ← «افراد» / «نقشها» / «حسابهای کاربری» — «تنظیمات» ← «کاربران و دسترسیها» ← «افراد» / «نقشها» / «حسابهای کاربری» — «تنظیمات» ← «کاربران و دسترسیها» ← «افراد» / «نقشها» / «حسابهای کاربری» — Settings → Users and Access → Individuals / Roles / User Accounts
In the digital twin, every user is built from two parts: an "Individual" (identity and organizational information) and a "User Account" (username, password, and roles). Roles build the org chart and determine which dashboards and pages each user sees. This lesson walks through the correct order for creating these three, along with locking and resetting a password.
Get to know the screens
| Page | Main job | Key controls |
|---|---|---|
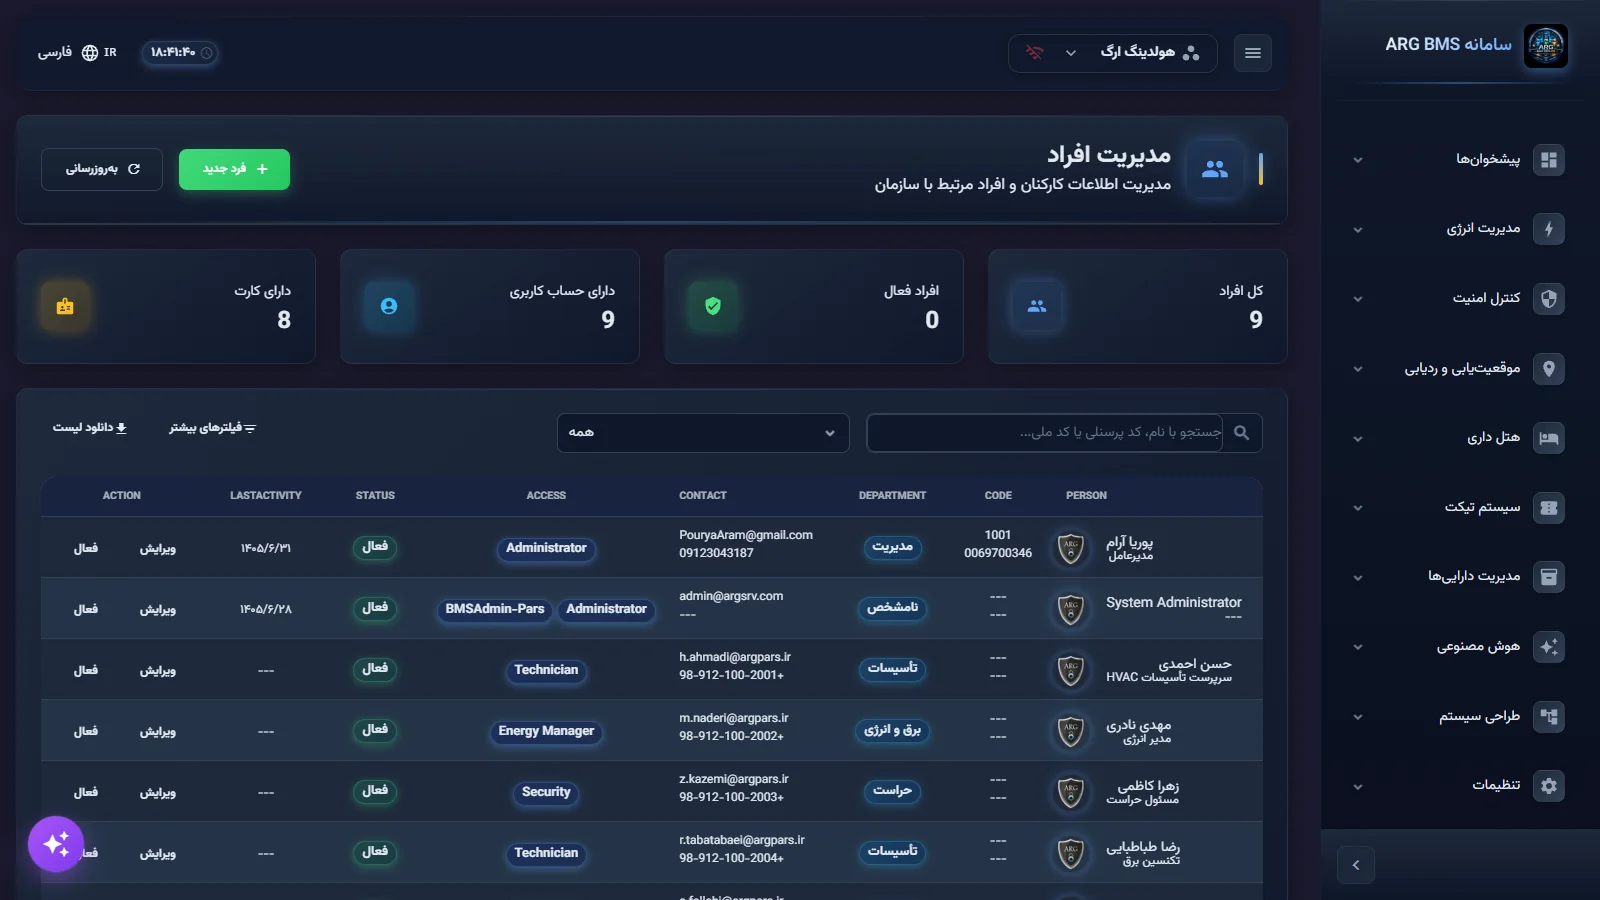
| افراد (Individuals) (titled "People Management") | Define staff and other people related to the organization | فرد جدید (New Person), بهروزرسانی (Refresh), a search box, a department list, ویرایش (Edit) and غیرفعال (Deactivate) buttons on each row |
| نقشها (Roles) (titled "Org Chart and Roles") | Define roles and their hierarchy | نقش جدید (New Role), the چارت سازمانی (Org Chart) and لیست نقشها (Role List) tabs, افزودن زیرمجموعه (Add Sub-role), کپی کردن (Duplicate), ویرایش, حذف (Delete) buttons |
| حسابهای کاربری (User Accounts) | Create a login account for a person and manage its status | ایجاد حساب کاربری (N) (Create User Account (N)), a status filter, each row's three-dot menu with ویرایش, تنظیم مجدد رمز عبور (Reset Password), قفل کردن (Lock) / باز کردن قفل (Unlock) |
| امنیت کاربر (User Security) (titled "Security Settings") | Let a user change their own password and see their account status | the تغییر (Change) button on the "Password" row, an "Account Status" section |
The N in the ایجاد حساب کاربری (N) button is the number of people who still have no account; if it is zero, the button is disabled. So always create the "Individual" first.
Step by step
- Define the individual. Open «تنظیمات» ← «کاربران و دسترسیها» ← «افراد» (Settings → Users and Access → Individuals) and click فرد جدید. نام (First Name) and نام خانوادگی (Last Name) are required (otherwise the message "First and last name are required" appears). If needed, fill in کد ملی (National ID), کد پرسنلی (Personnel Code), ایمیل (Email), and تلفن همراه (Mobile Number), choose the بخش (Department) from the list, and the موقعیت (Position) from among the project's role names. The وضعیت فعال (Active Status) checkbox is checked by default. Finish with ذخیره (Save). The personnel code is later used as the suggested username.
Add New Person · the name, personnel code, department, position, and active-status checkbox fields - Create the role. In نقشها click نقش جدید; or, on the چارت سازمانی tab, click a role's node and use افزودن زیرمجموعه, which pre-fills the نقش والد (Parent Role). Enter نام نقش * (Role Name *) (the ایجاد نقش (Create Role) button stays disabled while it is empty), add توضیحات (Description) if needed, and click ایجاد نقش.
Org Chart · the role tree; each node has Edit and Add Sub-role buttons 
Create New Role · role name, parent role with a "No parent" option, and description - Create the user account. In حسابهای کاربری click ایجاد حساب کاربری (N). Under انتخاب شخص * (Select Person *) pick the individual; their email and personnel code auto-fill ایمیل * (Email *) and نام کاربری * (Username *). The username must be at least 3 characters and the password at least 6, and تکرار رمز عبور * (Confirm Password *) must match the password. Choose the user's role or roles from نقشها and click ایجاد حساب (Create Account). The message "User account created successfully" means the person can now log in.
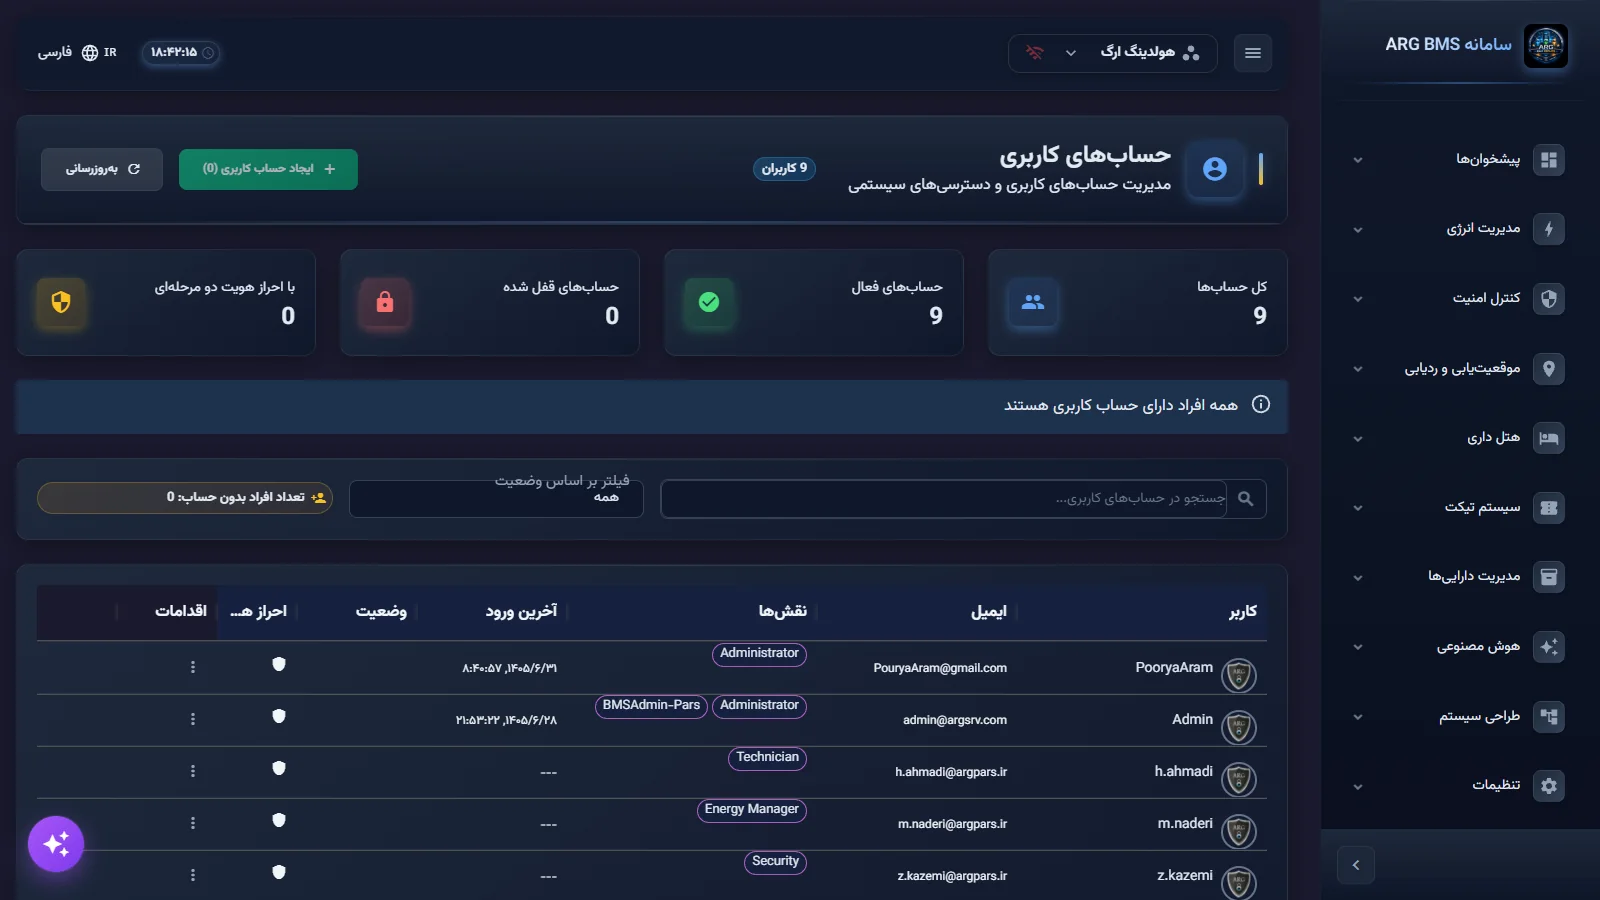
Create User Account · person selection, username, password, roles, and an advanced-settings section - Lock, unlock, and reset a password. In the accounts table, click a row's three dots. قفل کردن stops that user from logging in ("User account locked successfully"); باز کردن قفل reverses it. For a forgotten password, click تنظیم مجدد رمز عبور, fill in رمز عبور جدید * (New Password *) and تکرار رمز عبور *, and click the تنظیم مجدد رمز عبور button; hand the temporary password to the user through a secure channel.
- Letting a user change their own password. Each user goes to «تنظیمات» ← «تنظیمات پروژه» ← «امنیت کاربر» (Settings → Project Settings → User Security), clicks تغییر on the "Password" row, fills in رمز عبور فعلی (Current Password), رمز عبور جدید (New Password), and تکرار رمز عبور (Confirm Password), and clicks تغییر رمز عبور (Change Password). On success, the system logs the user out so they sign back in with the new password.
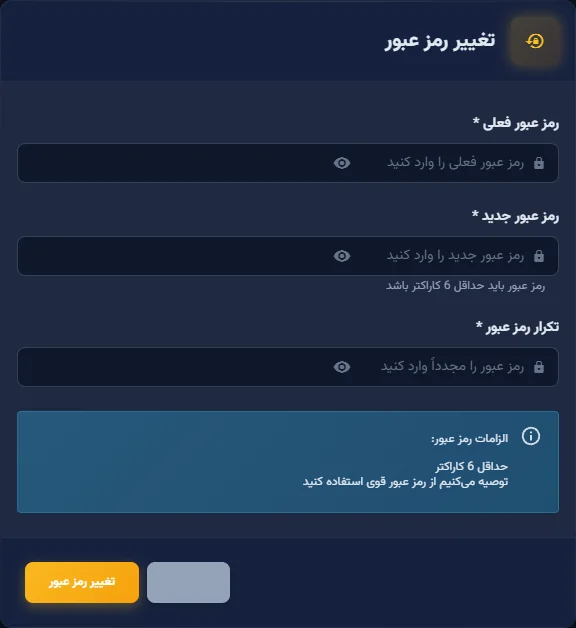
Change Password · current password, new password, and a password-requirements box - Retiring someone. When someone leaves the organization, click that row's افراد button in غیرفعال. A deactivated person cannot log in, but their history stays in the system.
Tips and common mistakes
- In the interface, a role whose name includes "Manager" or "admin" is treated as an administrative role. Avoid those words for non-administrative roles (for example, "Shift Supervisor").
- When editing an account, removing a role from the نقشها list does not remove it from the user; saving only adds new roles. If a role must be taken away from someone, coordinate with ARG support, or lock the account and create a new one.
- The حذف button is disabled for a system role or a role that a user holds. Duplicating a role repeatedly errors out on the name's uniqueness; rename the copy immediately.
- The 6-character minimum is only a floor; choose a long, mixed password.
- احراز هویت دو مرحلهای (Two-Factor Authentication) and فعالسازی دسترسی API (Enable API Access) are labeled "coming soon" and are not active in this version.
- The فیلترهای بیشتر (More Filters) and دانلود لیست (Download List) buttons on the Individuals page do nothing in this version.
Summary
- Correct order: individual → role → user account.
- Locking, unlocking, and resetting a password happen from the "User Accounts" three-dot menu.
- Five failed logins lock an account automatically.
- The "Permissions" page does not currently save; server-side enforcement is the project key level.
Hands-on exercise on the live demo
Work on the public demo (bms.argsrv.com, project "ARG Holding") and do not edit or delete any existing person, role, or account.
- Open افراد and check the stat cards and the ACCESS column; note how many people have a user account.
- Click فرد جدید and build a person named "Exercise — your name"; first click ذخیره without a last name and see the error message.
- In نقشها, on the چارت سازمانی tab, use افزودن زیرمجموعه to create a role named "Exercise — your name" and see its place in the tree.
- In حسابهای کاربری, create an account for the exercise person; first give a 5-character password and see the message; then قفل کردن and باز کردن قفل the account.
- Finally, غیرفعال the exercise person and حذف the exercise role.
If the demo account does not allow saving, go only as far as the preview stage: open and fill in the dialogs, then click انصراف (Cancel) without saving.
Lesson check
Answer at least 3 of 4 correctly to pass.
- 1. Why might the "Create User Account (N)" button be disabled?
- 2. After how many failed logins does a user's account lock automatically?
- 3. Which page's changes are not currently saved on the server?
- 4. When is a role's "Delete" button disabled?